VOLTTRON Central Deployment
VOLTTRON Central is a platform management web application that allows platforms to communicate and to be managed from a centralized server. This agent alleviates the need to ssh into independent nodes in order to manage them. The demo will start up three different instances of VOLTTRON with three historians and different agents on each host. The following entries will help to navigate around the VOLTTRON Central interface.
Contents
Getting Started
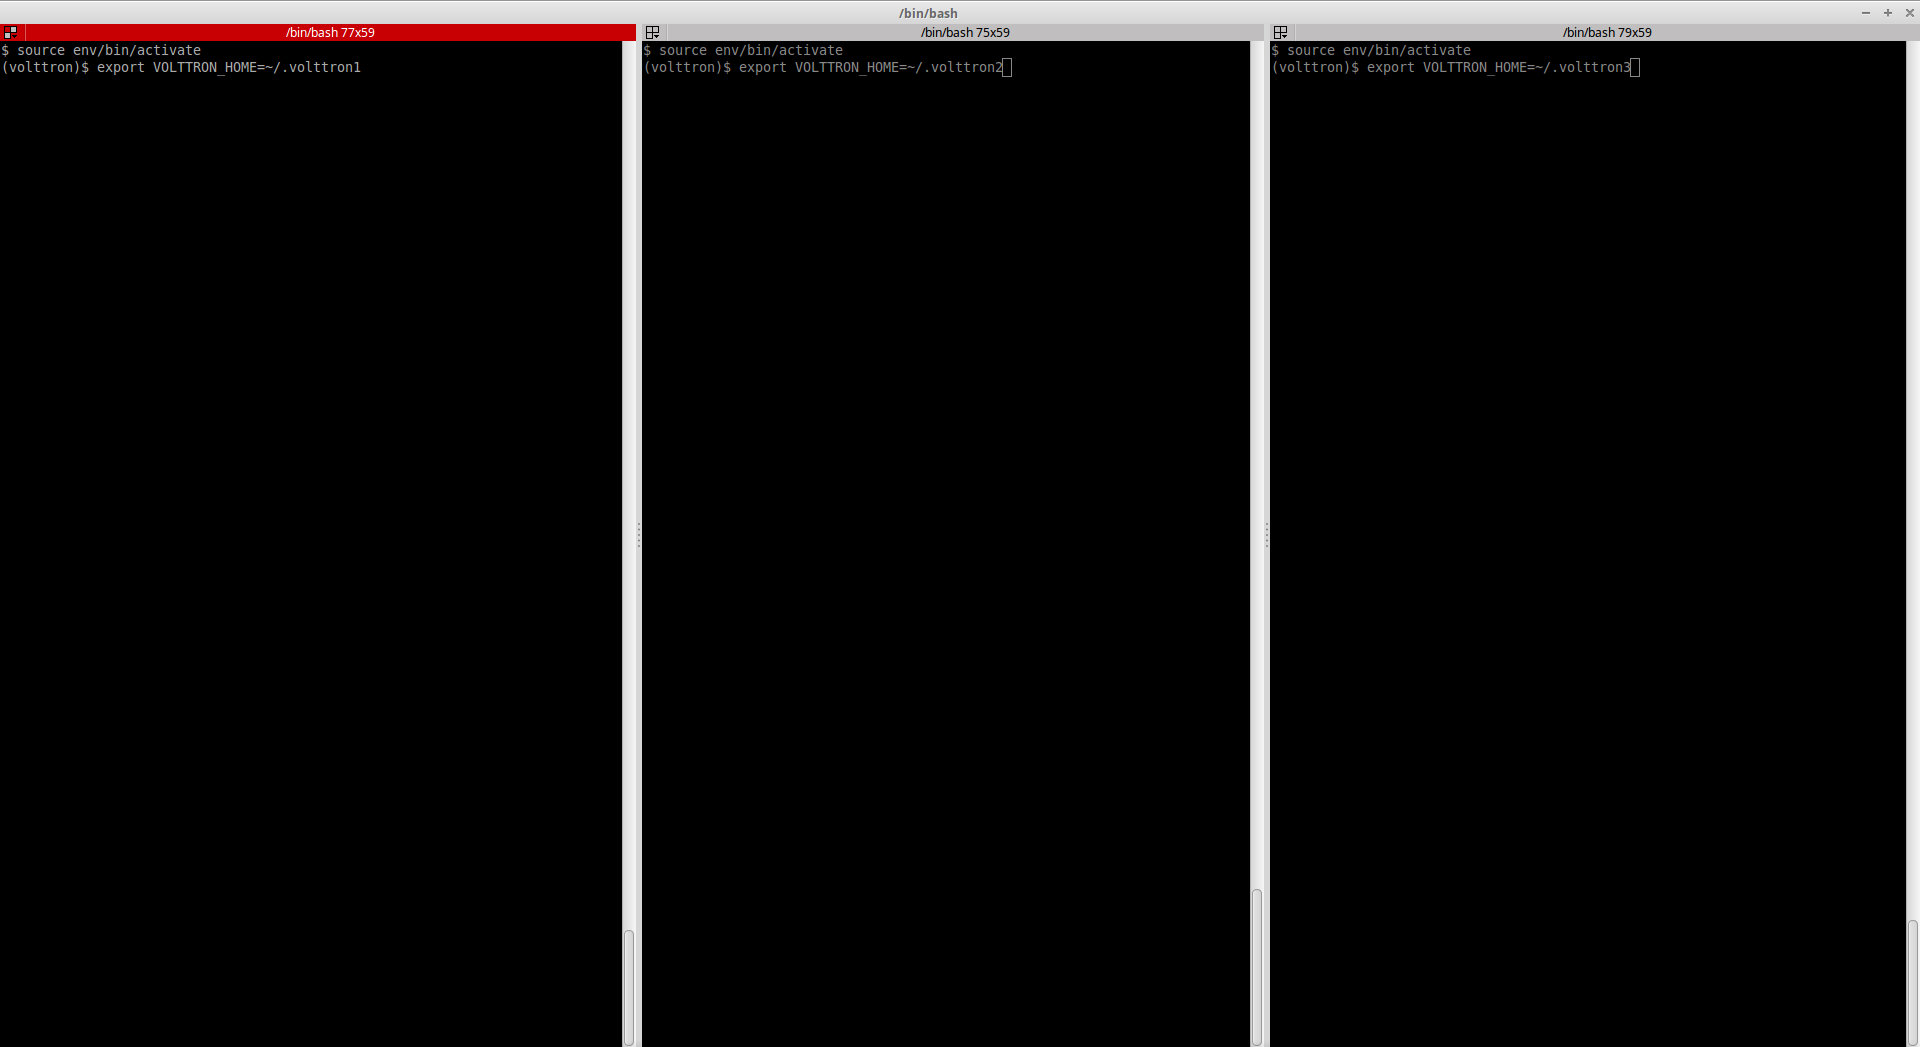
After installing VOLTTRON, open three shells with the current directory the root of the VOLTTRON repository. Then activate the VOLTTRON environment and export the VOLTTRON_HOME variable. The home variable needs to be different for each instance.
If you are using Terminator you can right click and select “Split Vertically”. This helps us keep from losing terminal windows or duplicating work.
$ source env/bin/activate
$ export VOLTTRON_HOME=~/.volttron1
One of our instances will have a VOLTTRON Central agent. We will install a platform agent and a historian on all three platforms. Please note, for this demo all the instances run on the ZeroMQ message bus. For multi-platform, multi-bus deployment setup please follow the steps described in Multi Platform Multi-Bus Deployment.
Run vcfg in the first shell. This command will ask how the instance should be set up. Many of the options have defaults that will be sufficient. When asked if this instance is a VOLTTRON Central enter y. Read through the options and use the enter key to accept default options. There are no default credentials for VOLTTRON Central. You can have it install the agents at this time. Below is an example configuration. In this case, username is user and localhost is volttron-pc.
(volttron)user@volttron-pc:~/volttron$ vcfg

Your VOLTTRON_HOME currently set to: /home/user/.volttron1

Is this the volttron you are attempting to setup? [Y]:
What type of message bus (rmq/zmq)? [zmq]:
What is the vip address? [tcp://127.0.0.1]:
What is the port for the vip address? [22916]:
Is this instance web enabled? [N]: y
What is the protocol for this instance? [https]:
Web address set to: https://volttron-pc
What is the port for this instance? [8443]:
Would you like to generate a new web certificate? [Y]:
WARNING! CA certificate does not exist.
Create new root CA? [Y]:

Please enter the following details for web server certificate:
        Country: [US]:
        State: WA
        Location: Richland
        Organization: PNNL
        Organization Unit: VOLTTRON
Created CA cert
Creating new web server certificate.
Is this an instance of volttron central? [N]: y
Configuring /home/user/volttron/services/core/VolttronCentral.
Installing volttron central.
Should the agent autostart? [N]: y
VC admin and password are set up using the admin web interface.
After starting VOLTTRON, please go to https://volttron-pc:8443/admin/login.html to complete the setup.
Will this instance be controlled by volttron central? [Y]: y
Configuring /home/user/volttron/services/core/VolttronCentralPlatform.
What is the name of this instance? [volttron1]:
Volttron central address set to https://volttron-pc:8443
Should the agent autostart? [N]: y
Would you like to install a platform historian? [N]: y
Configuring /home/user/volttron/services/core/SQLHistorian.
Should the agent autostart? [N]: y
Would you like to install a platform driver? [N]: y
Configuring /home/user/volttron/services/core/PlatformDriverAgent.
Would you like to install a fake device on the platform driver? [N]: y
Should the agent autostart? [N]: y
Would you like to install a listener agent? [N]: y
Configuring examples/ListenerAgent.
Should the agent autostart? [N]: y
Finished configuration!

You can now start the volttron instance.

If you need to change the instance configuration you can edit
the config file is at /home/user/.volttron1/config

(volttron)user@volttron-pc:~/volttron$
VOLTTRON Central needs to accept the connecting instances’ public keys. For this example we’ll allow any CURVE credentials to be accepted. After starting, the command vctl auth add will prompt the user for information about how the credentials should be used. We can simply hit Enter to select defaults on all fields except credentials, where we will type /.*/
$ vctl auth add --credentials "/.*/"
added entry domain=None, address=None, mechanism='CURVE', credentials=u'/.*/', user_id='63b126a7-2941-4ebe-8588-711d1e6c70d1'
For more information on authorization see authentication.
Remote Platform Configuration
The next step is to configure the instances that will connect to VOLTTRON Central. In the second and third terminal windows run vcfg. Like the VOLTTRON_HOME variable, these instances need to have a unique VIP address and a unique instance name.
Install a platform agent and a historian as before. Since we used the default options when configuring VOLTTRON Central, we can use the default options when configuring these platform agents as well. The configuration will be a little different. The example below is for the second volttron instance. Note the unique VIP address and instance name. Please ensure the web-address of the volttron central is configured correctly.
(volttron)user@volttron-pc:~/volttron$ vcfg

Your VOLTTRON_HOME currently set to: /home/user/.volttron2

Is this the volttron you are attempting to setup? [Y]:
What type of message bus (rmq/zmq)? [zmq]:
What is the vip address? [tcp://127.0.0.1]: tcp://127.0.0.2
What is the port for the vip address? [22916]:
Is this instance web enabled? [N]:
Will this instance be controlled by volttron central? [Y]:
Configuring /home/user/volttron/services/core/VolttronCentralPlatform.
What is the name of this instance? [volttron1]: volttron2
What is the hostname for volttron central? [https://volttron-pc]:
What is the port for volttron central? [8443]:
Should the agent autostart? [N]: y
Would you like to install a platform historian? [N]: y
Configuring /home/user/volttron/services/core/SQLHistorian.
Should the agent autostart? [N]: y
Would you like to install a platform driver? [N]:
Would you like to install a listener agent? [N]:
Finished configuration!

You can now start the volttron instance.

If you need to change the instance configuration you can edit
the config file is at /home/user/.volttron2/config

(volttron)user@volttron-pc:~/volttron$
Starting the Demo
Start each Volttron instance after configuration. You have two options.
Option 1: The following command starts the volttron process in the background. The “-l” option tells volttron to log to a file. The file name should be different for each instance.
$ volttron -vv -l volttron.log&
Option 2: Use the utility script start-volttron. This will override the default log file each time the script is ran unless the script is modified with a different filename for each instance.
$ ./start-volttron
Note
If you chose to not start your agents with their platforms they will need to be started by hand.
List the installed agents with
$ vctl status
A portion of each agent’s uuid makes up the leftmost column of the status output. This is all that is needed to start or stop the agent. If any installed agents share a common prefix then more of the uuid will be needed to identify it.
$ vctl start uuid
or
$ vctl start --tag tag
Note
In each of the above examples one could use * suffix to match more than one agent.
VOLTTRON Admin
The admin page is used to set the master username and password for both admin page and VOLTTRON Central page. Admin page can then be used to manage RMQ and ZMQ certificates and credentials.
Open a web browser and navigate to https://volttron-pc:8443/admin/login.html
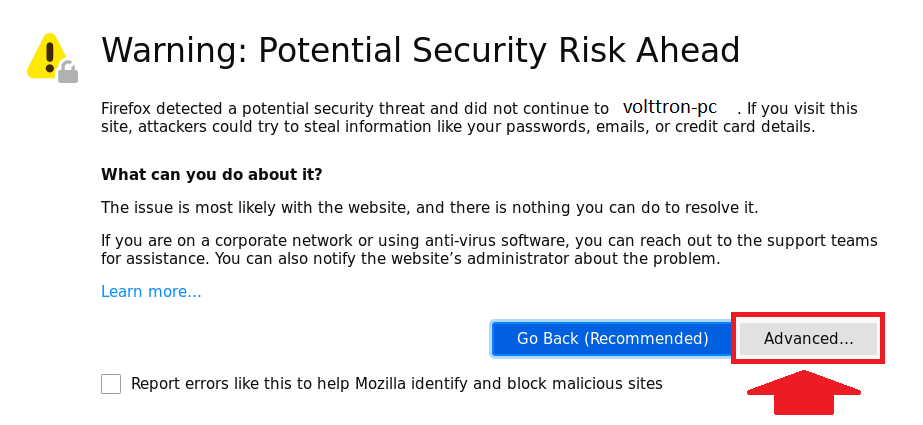
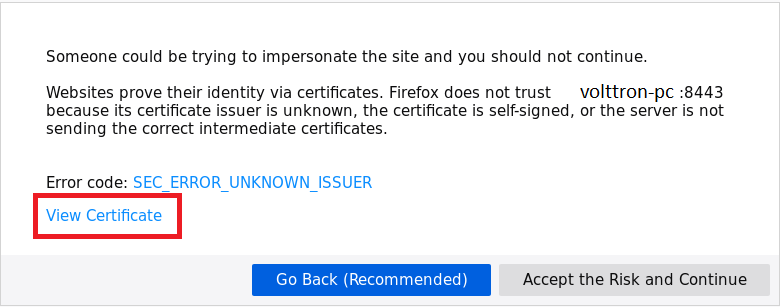
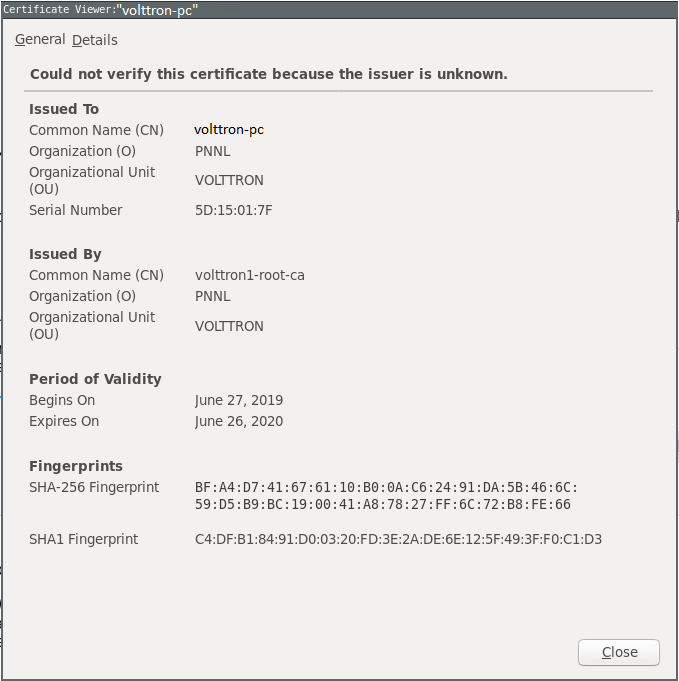
There may be a message warning about a potential security risk. Check to see if the certificate that was created in vcfg is being used. The process below is for firefox.
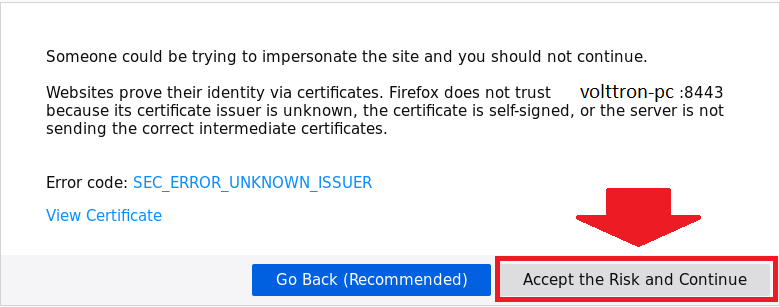
When the admin page is accessed for the first time, the user will be prompted to set up a master username and password.
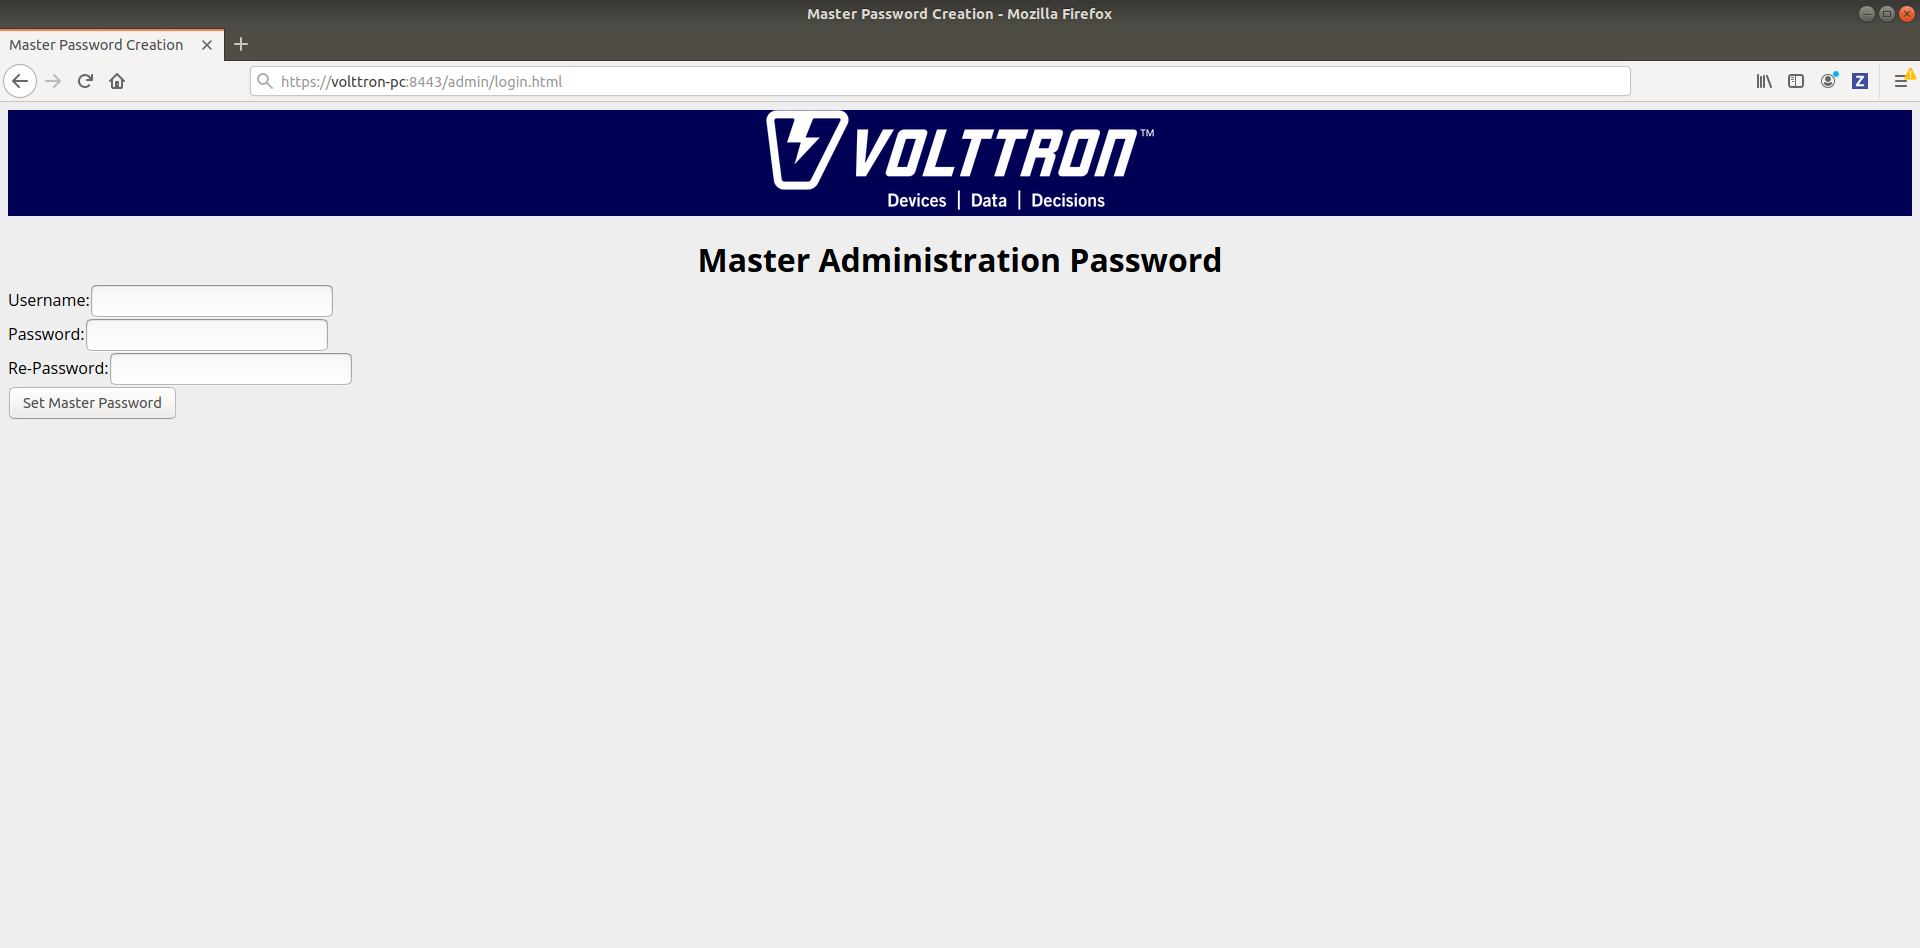
Open your browser to the web address that you specified for the VOLTTRON Central agent that you configured for the first instance. In the above examples, the configuration file would be located at ~/.volttron1/config and the VOLTTRON Central address would be defined in the “volttron-central-address” field. The VOLTTRON Central address takes the pattern: https://<localhost>:8443/vc/index.html, where localhost is the hostname of your machine. In the above examples, our hostname is volttron-pc; thus our VC interface would be https://volttron-pc:8443/vc/index.html.
You will need to provide the username and password set earlier through admin web page.
Stopping the Demo
Once you have completed your walk through of the different elements of the VOLTTRON Central demo you can stop the demos by executing the following command in each terminal window.
$ ./stop-volttron
Once the demo is complete you may wish to see the VOLTTRON Central Management Agent page for more details on how to configure the agent for your specific use case.
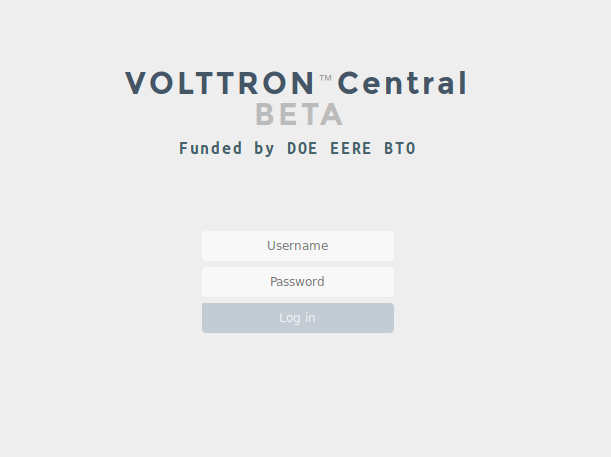
Log In
To log in to VOLTTRON Central, open a browser and login to the Volttron web interface, which takes the form https://localhost:8443/vc/index.html where localhost is the hostname of your machine. In the above example, we open the following URL in which our localhost is “volttron-pc”: https://volttron-pc:8443/vc/index.html and enter the user name and password on the login screen.

Log Out
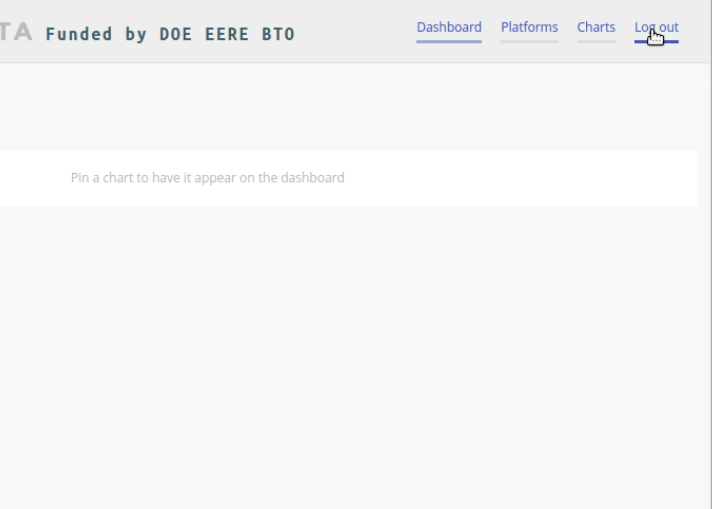
To log out of VOLTTRON Central, click the link at the top right of the screen.
Platforms Tree
The side panel on the left of the screen can be extended to reveal the tree view of registered platforms.
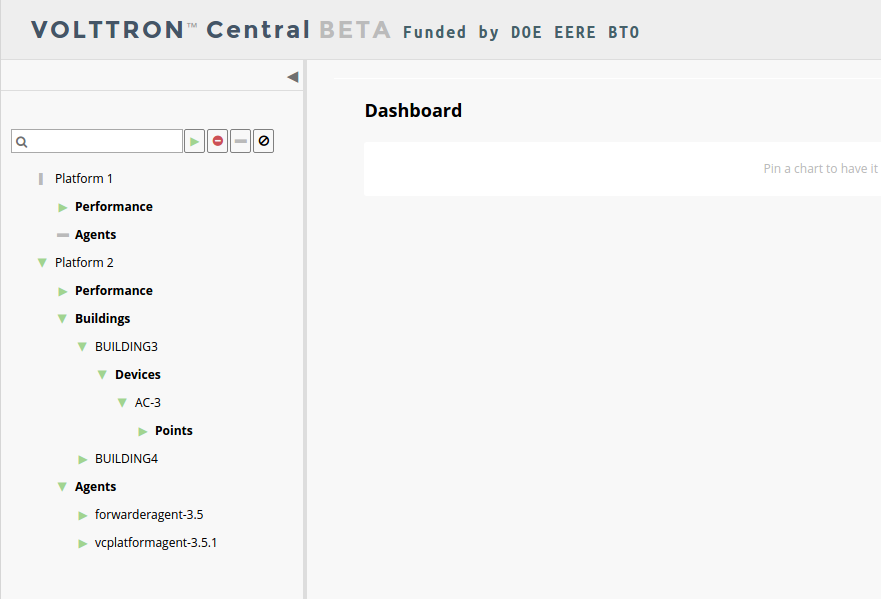
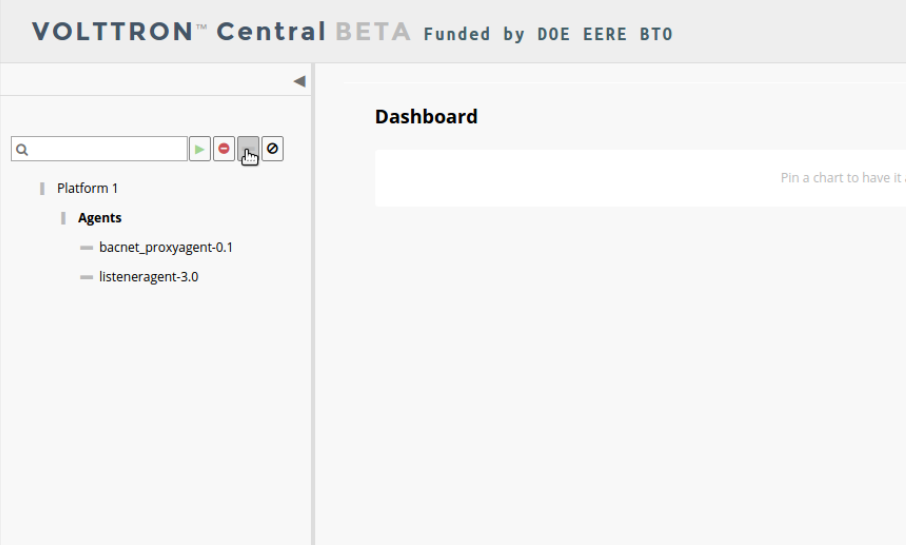
Top-level nodes in the tree are platforms. Platforms can be expanded in the tree to reveal installed agents, devices on buildings, and performance statistics about the platform instances.
Loading the Tree
The initial state of the tree is not loaded. The first time a top-level node is expanded is when the items for that platform are loaded.
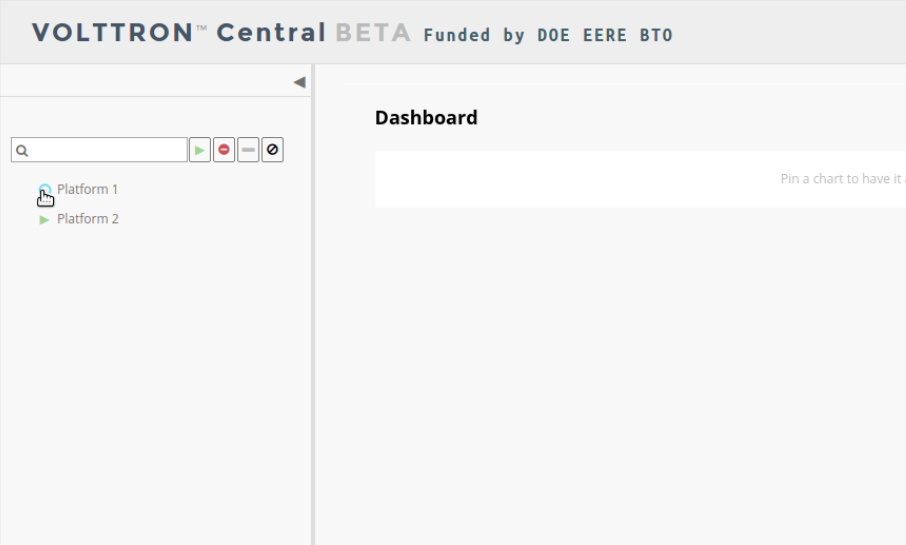
After a platform has been loaded in the tree, all the items under a node can be quickly expanded by double-clicking on the node.
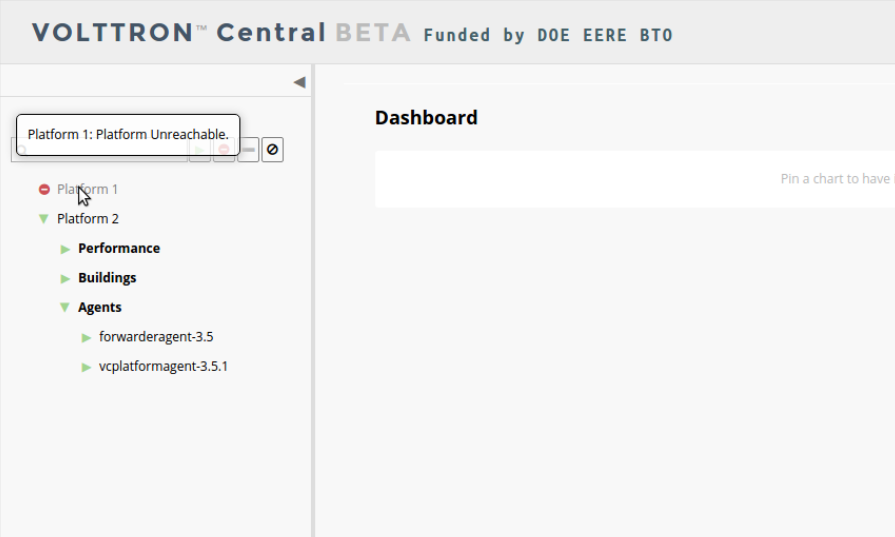
Health Status
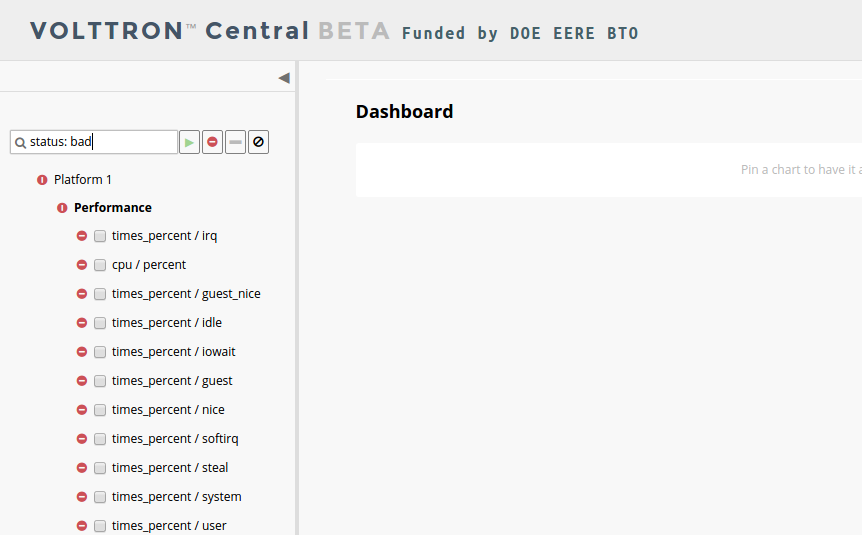
The health status of an item in the tree is indicated by the color and shape next to it. A green triangle means healthy, a red circle means there’s a problem, and a gray rectangle means the status can’t be determined.
Information about the health status also may be found by hovering the cursor over the item.
Filter the Tree
The tree can be filtered by typing in the search field at the top or clicking on a status button next to the search field.

Meta terms such as “status” can also be used as filter keys. Type the keyword “status” followed by a colon, and then the word “good,” “bad,” or “unknown.”
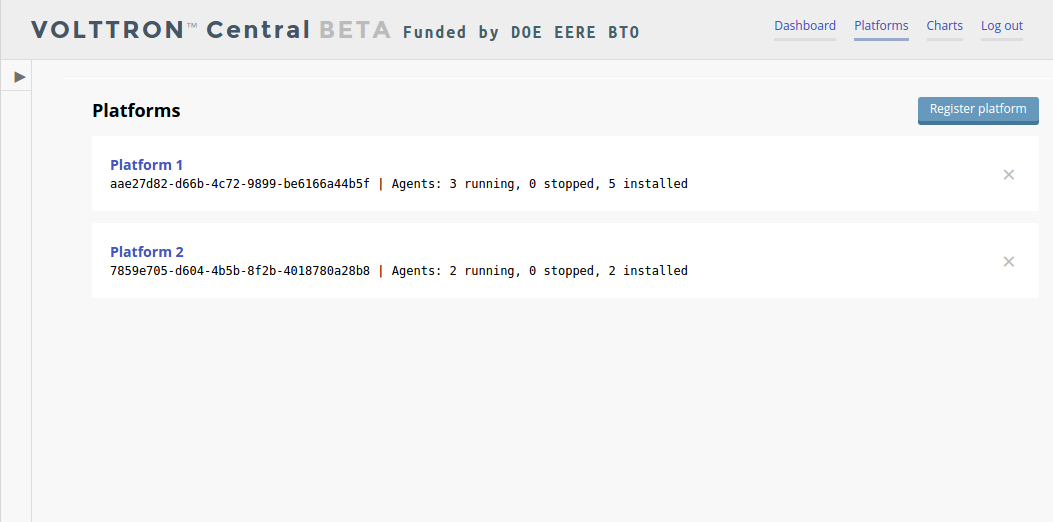
Platforms Screen
This screen lists the registered VOLTTRON platforms and allows new platforms to be registered by clicking the Register Platform button. Each platform is listed with its unique ID and the number and status of its agents. The platform’s name is a link that can be clicked on to go to the platform management view.
Platform View
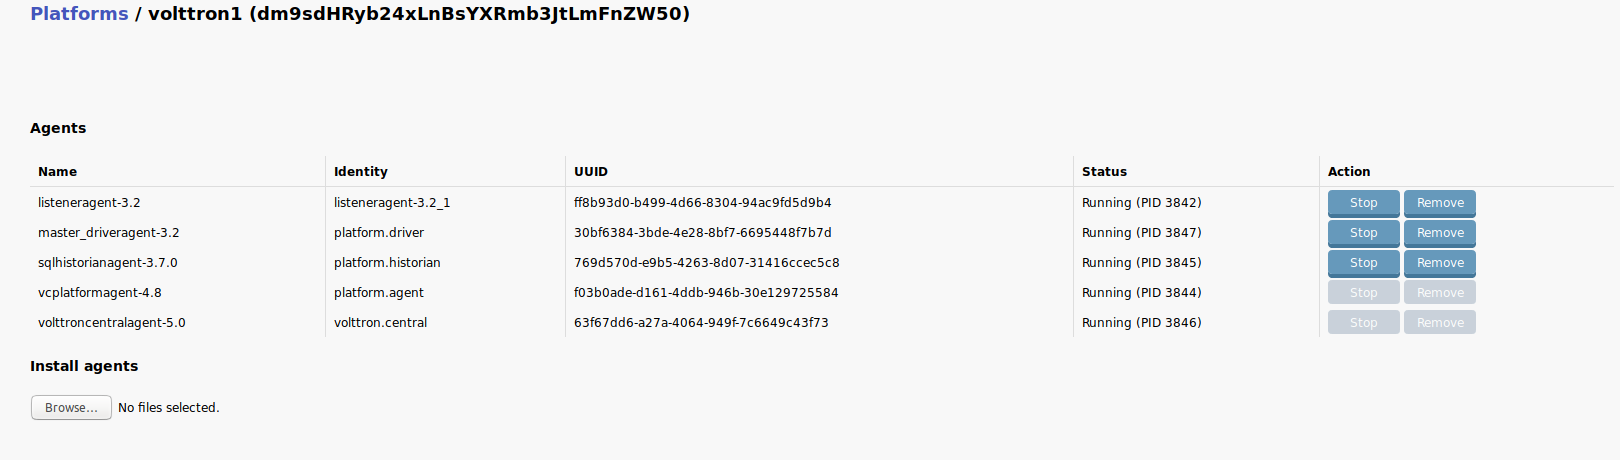
From the platforms screen, click on the name link of a platform to manage it. Managing a platform includes installing, starting, stopping, and removing its agents.
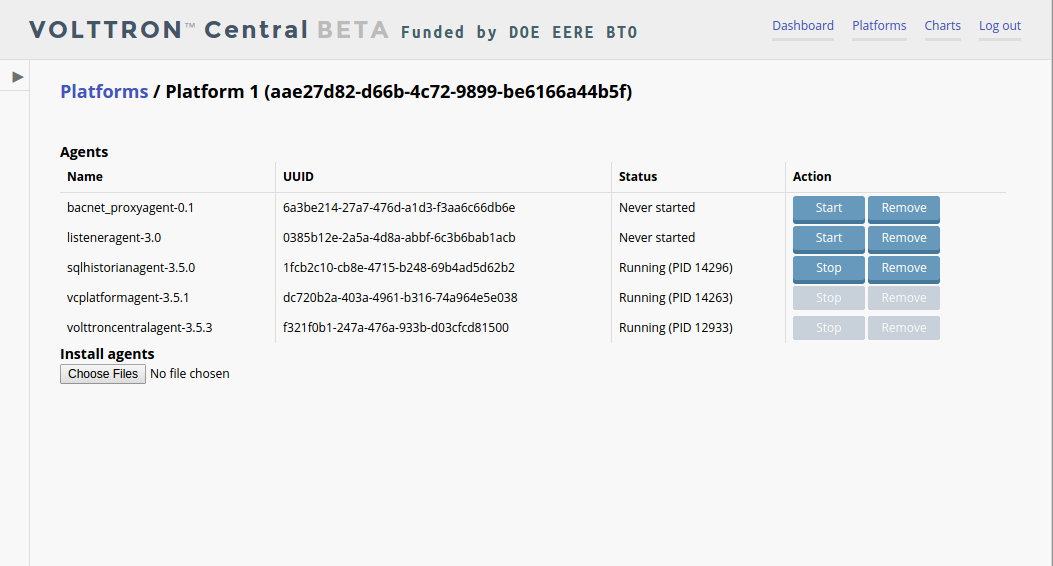
To install a new agent, all you need is the agent’s wheel file. Click on the button and choose the file to upload it and install the agent.
To start, stop, or remove an agent, click on the button next to the agent in the list. Buttons may be disabled if the user lacks the correct permission to perform the action or if the action can’t be performed on a specific type of agent. For instance, platform agents and VOLTTRON Central agents can’t be removed or stopped, but they can be restarted if they’ve been interrupted.
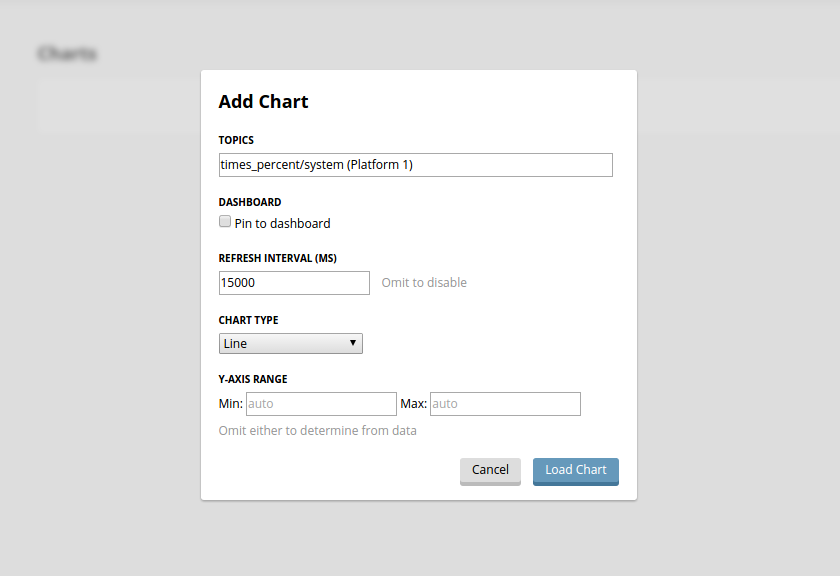
Add Charts
Performance statistics and device points can be added to charts either from the Charts page or from the platforms tree in the side panel.
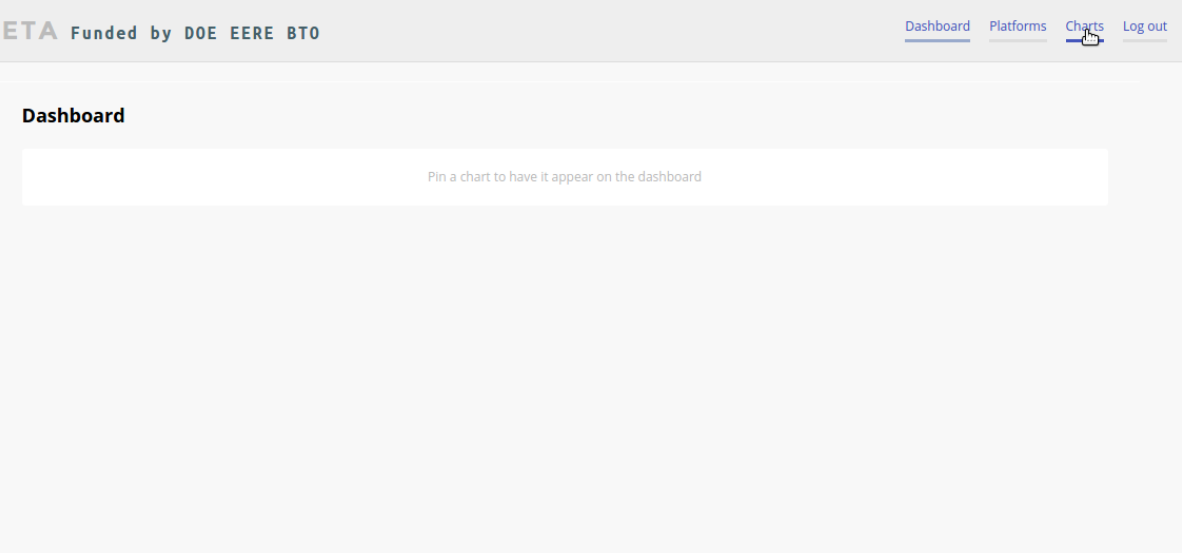
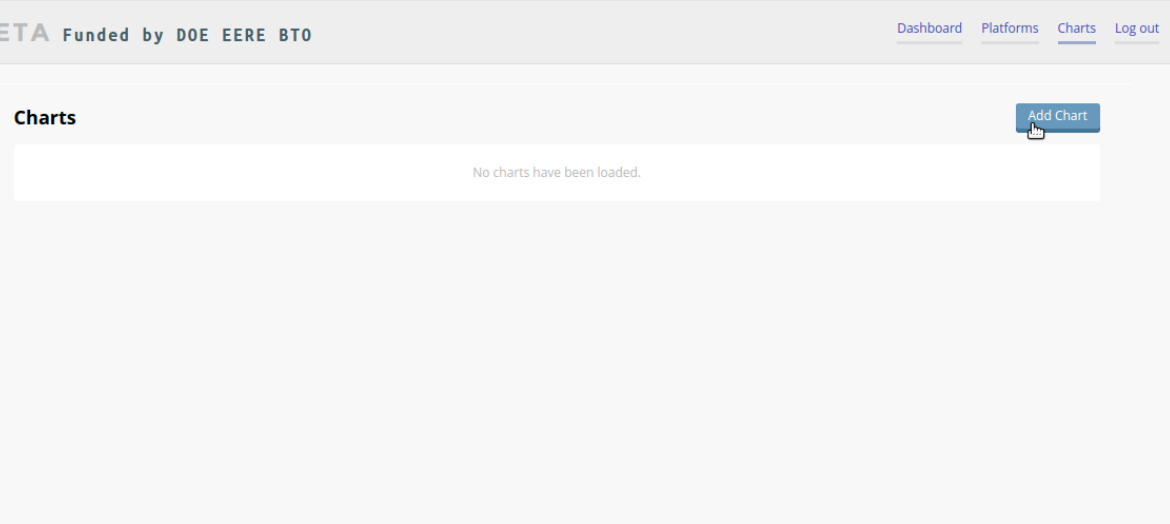
Click the Charts link at the top-right corner of the screen to go to the Charts page.
From the Charts page, click the Add Chart button to open the Add Chart window.
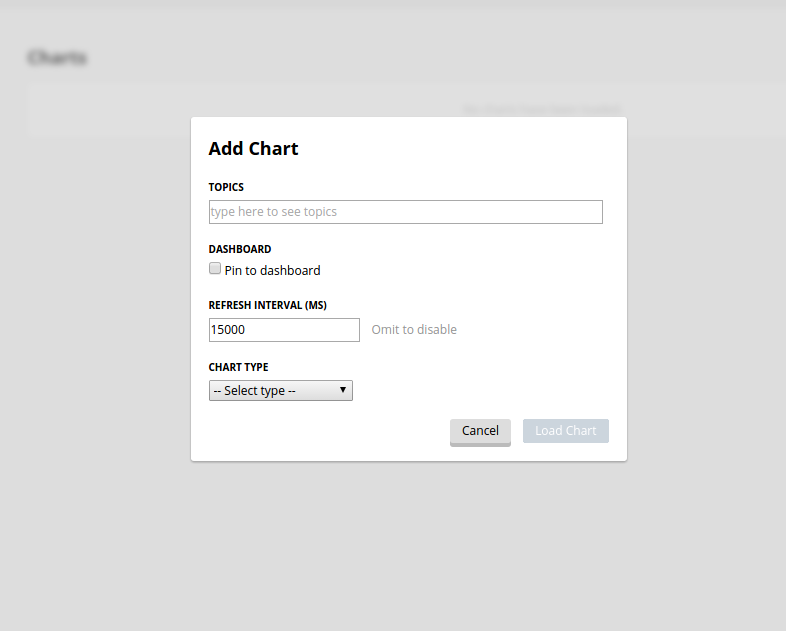
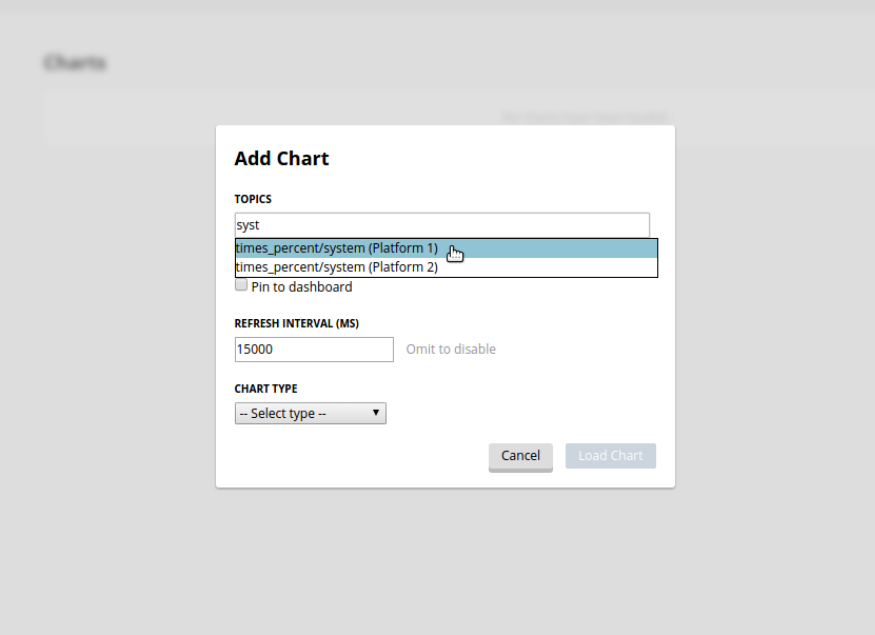
Click in the topics input field to make the list of available chart topics appear.
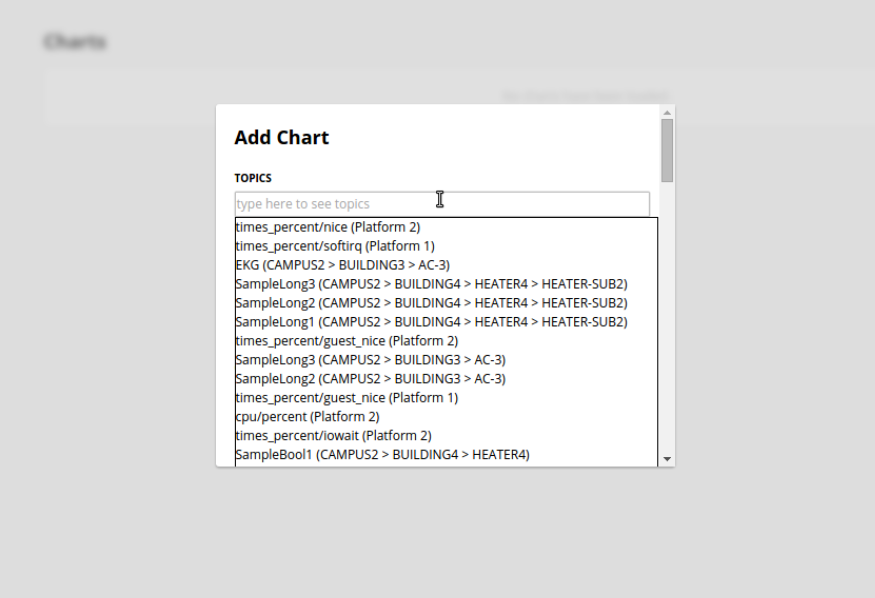
Scroll and select from the list, or type in the field to filter the list, and then select.
Select a chart type and click the Load Chart button to close the window and load the chart.
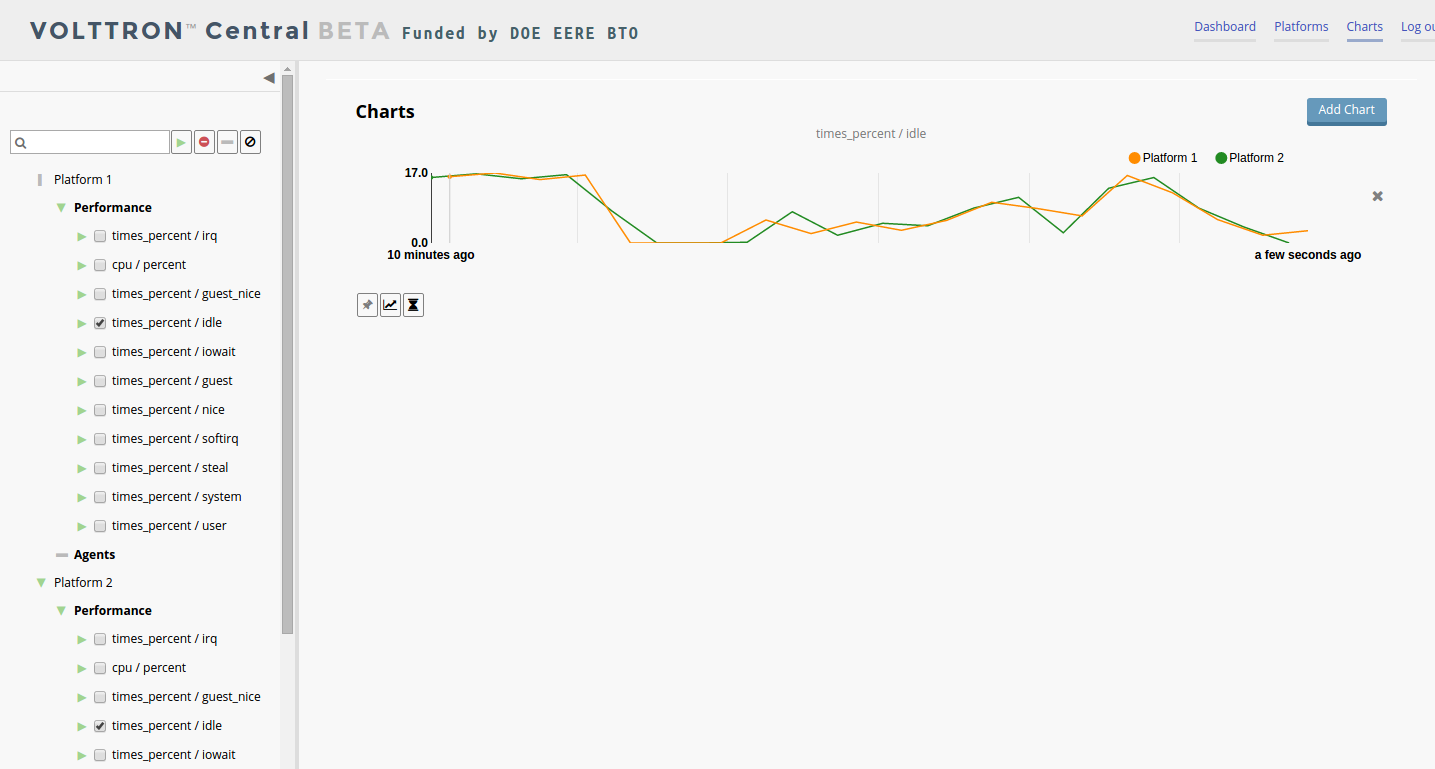
To add charts from the side panel, check boxes next to items in the tree.
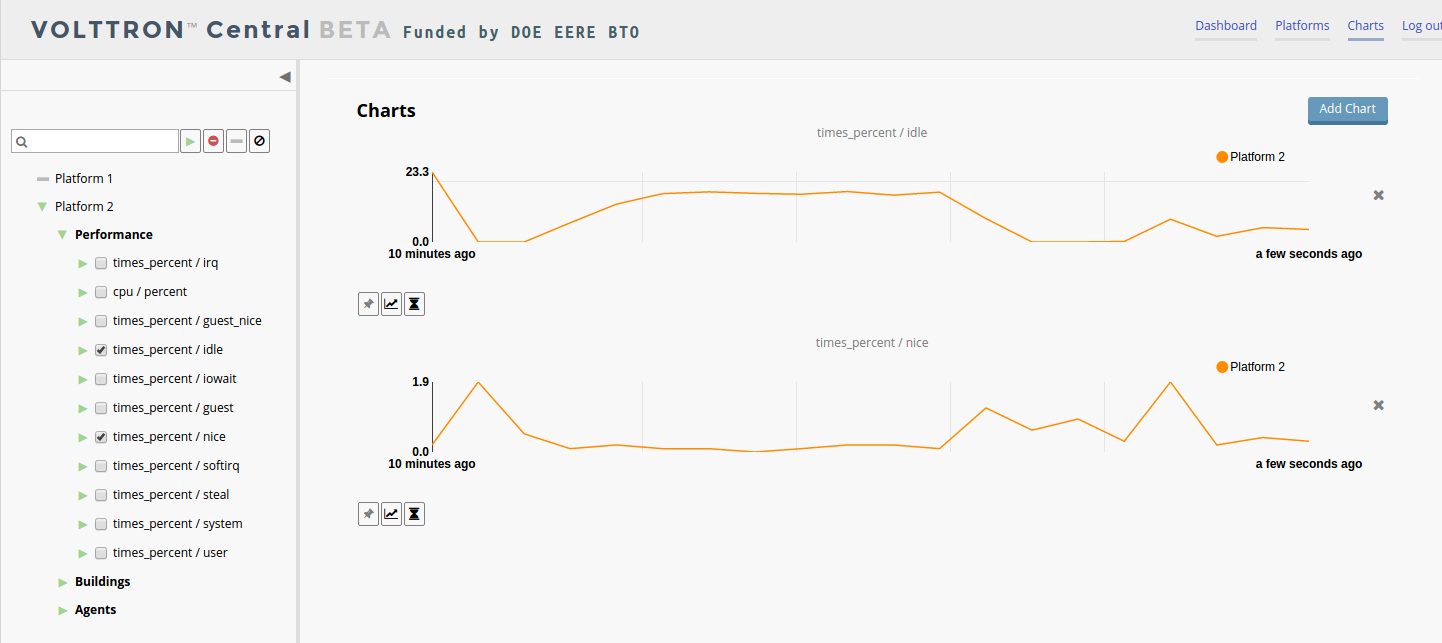
Choose points with the same name from multiple platforms or devices to plot more than one line in a chart.
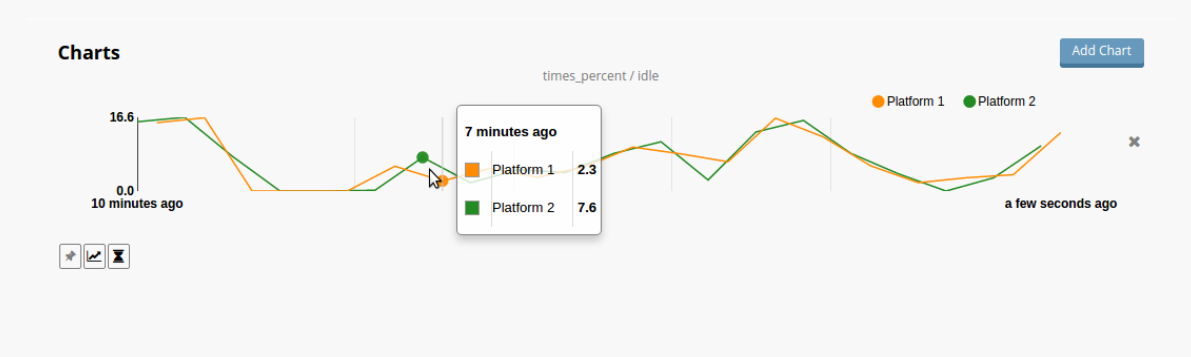
Move the cursor arrow over the chart to inspect the graphs.
To change the chart’s type, click on the Chart Type button and choose a different option.
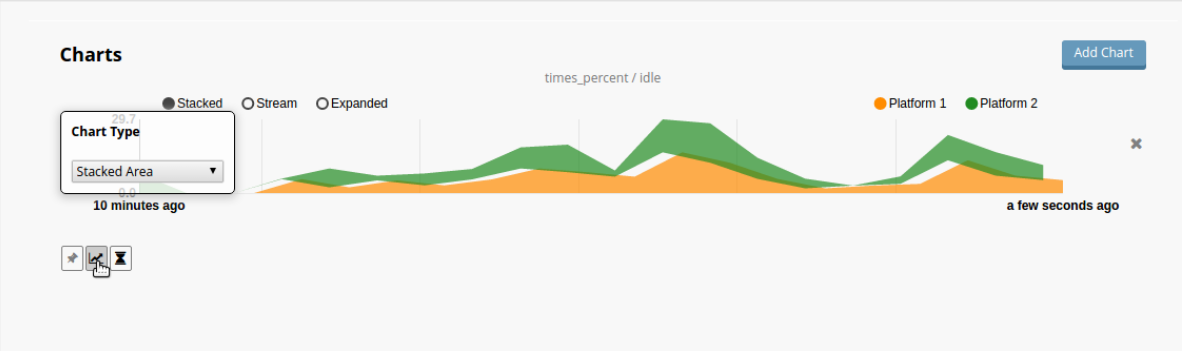
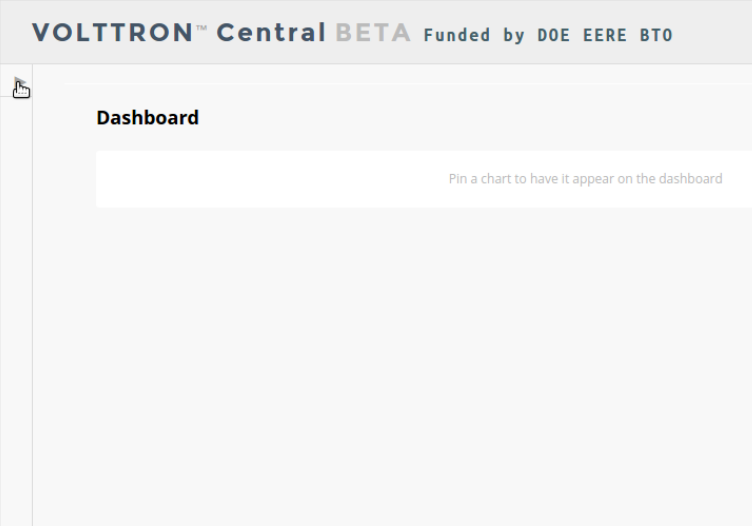
Dashboard Charts
To pin a chart to the Dashboard, click the Pin Chart button to toggle it. When the pin image is black and upright, the chart is pinned; when the pin image is gray and diagonal, the chart is not pinned and won’t appear on the Dashboard.
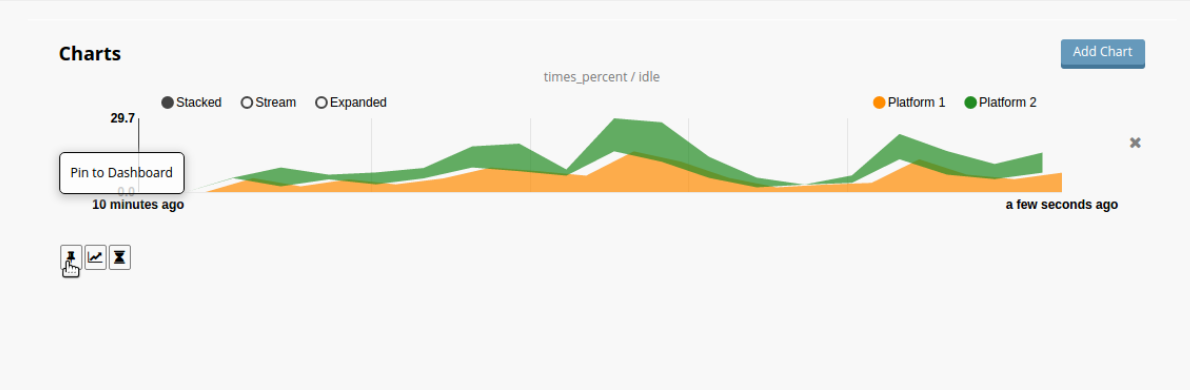
Charts that have been pinned to the Dashboard are saved to the database and will automatically load when the user logs in to VOLTTRON Central. Different users can save their own configurations of dashboard charts.
Remove Charts
To remove a chart, uncheck the box next to the item in the tree or click the X button next to the chart on the Charts page. Removing a chart removes it from the Charts page and the Dashboard.
VOLTTRON Central
Navigate to https://volttron-pc:8443/vc/index.html
Log in using the username and password you set up on the admin web page.
Once you have logged in, click on the Platforms tab in the upper right corner of the window.

Once in the Platforms screen, click on the name of the platform.
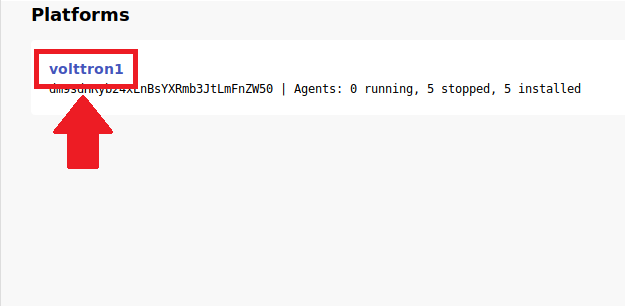
You will now see a list of agents. They should all be running.
For more information on VOLTTRON Central, please see:
Note
You may want to consider securing your VC deployment Please take particular note of the implementation of a reverse proxy.