Device Configuration in VOLTTRON Central
Devices in your network can be detected and configured through the VOLTTRON Central UI. The current version of VOLTTRON enables device detection and configuration for BACnet devices. The following sections describe the processes involved with performing scans to detect physical devices and get their points, and configuring them as virtual devices installed on VOLTTRON instances.
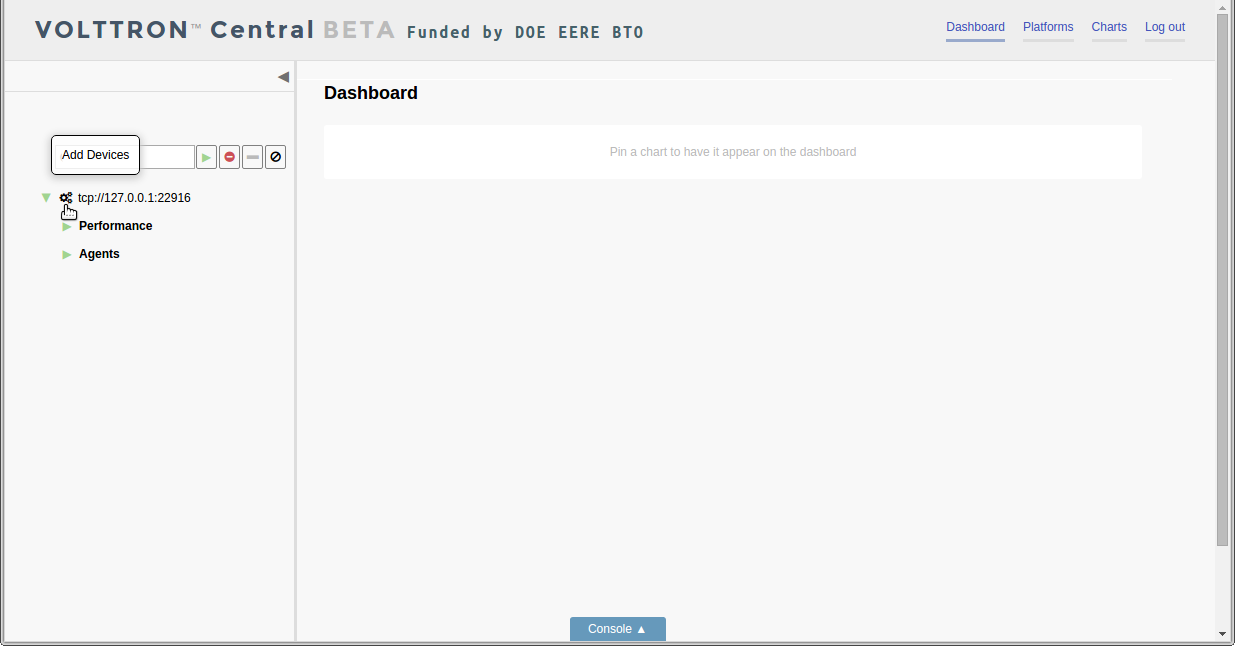
Launching Device Configuration
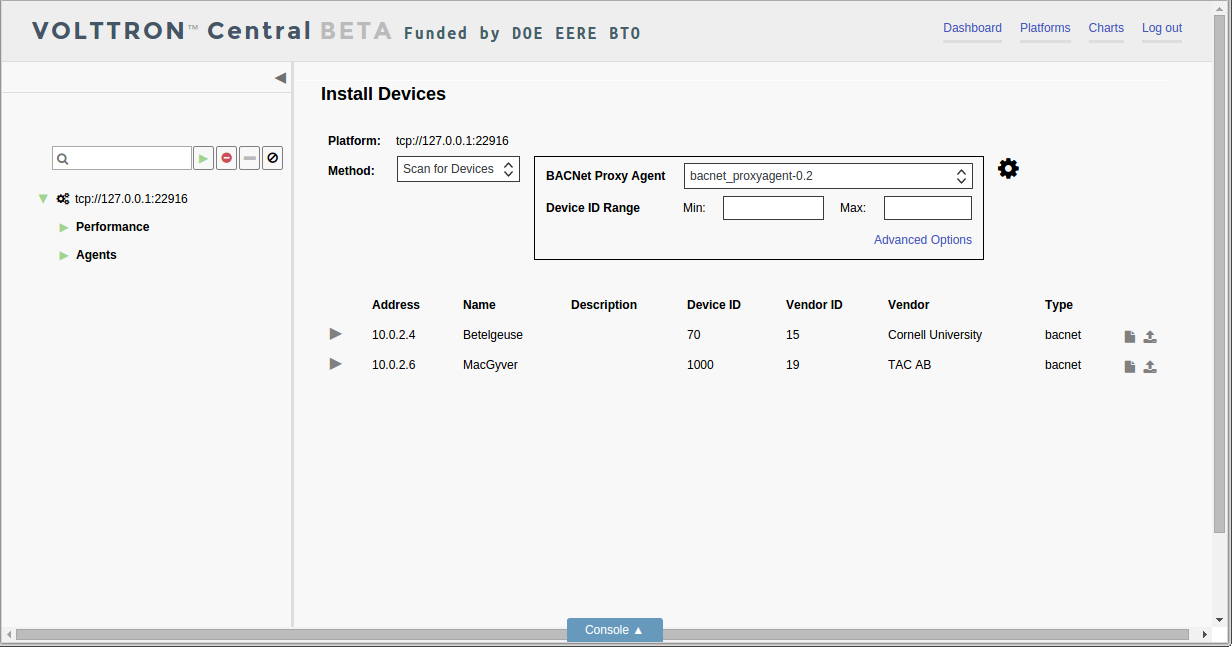
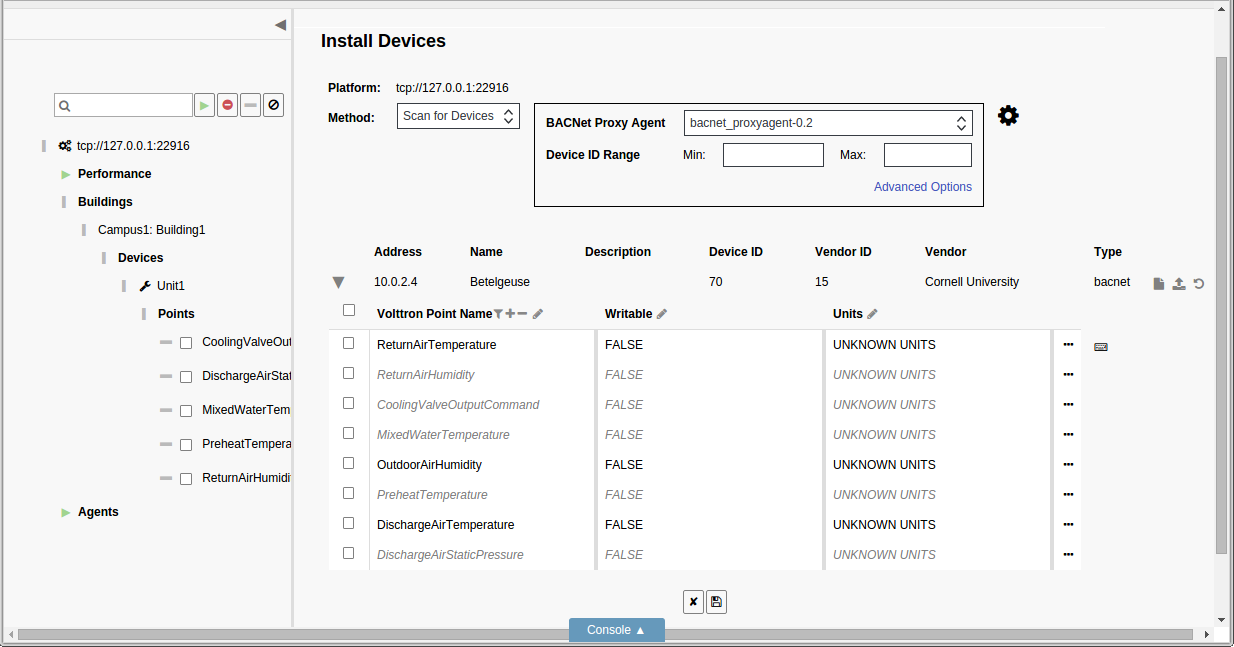
To begin device configuration in VOLTTRON Central, extend the side panel on the left and find the cogs button next to the platform instance you want to add a device to. Click the cogs button to launch the device configuration feature.
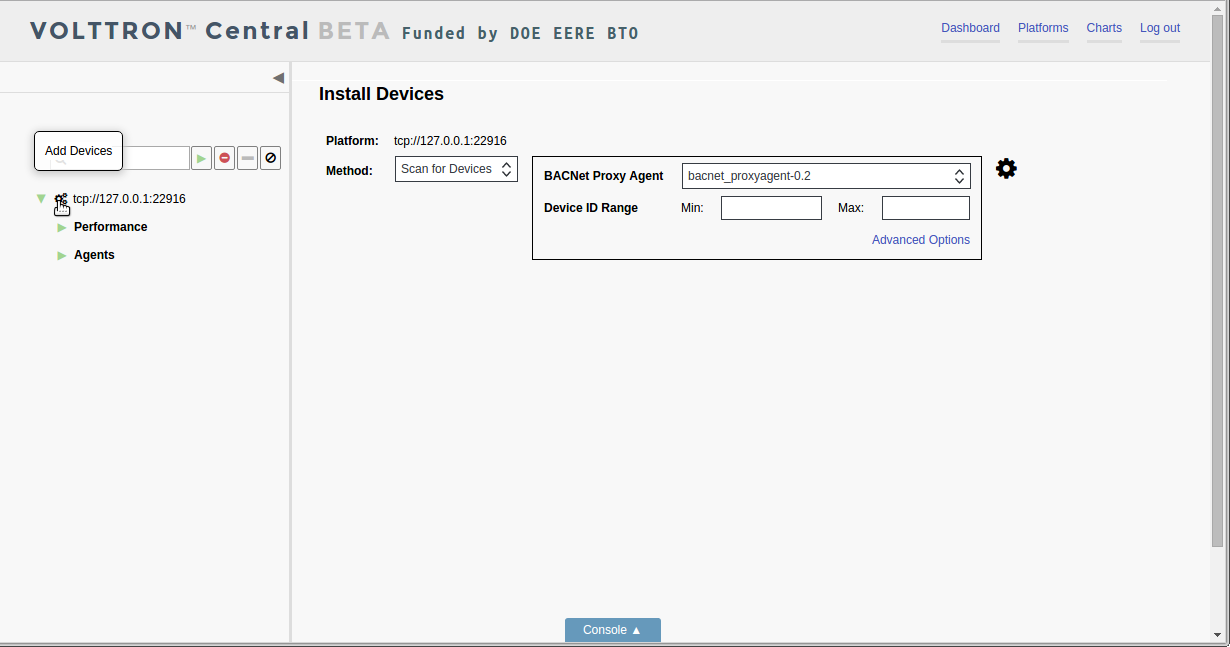
Currently the only method of adding devices is to conduct a scan to detect BACnet devices. A BACnet Proxy Agent must be running in order to do the scan. If more than one BACnet Proxy is installed on the platform, choose the one that will be used for the scan.
The scan can be conducted using default settings that will search for all physical devices on the network. However, optional settings can be used to focus on specific devices or change the duration of the scan. Entering a range of device IDs will limit the scan to return only devices with IDs in that range. Advanced options include the ability to specify the IP address of a device to detect as well as the ability to change the duration of the scan from the default of five seconds.
Scanning for Devices
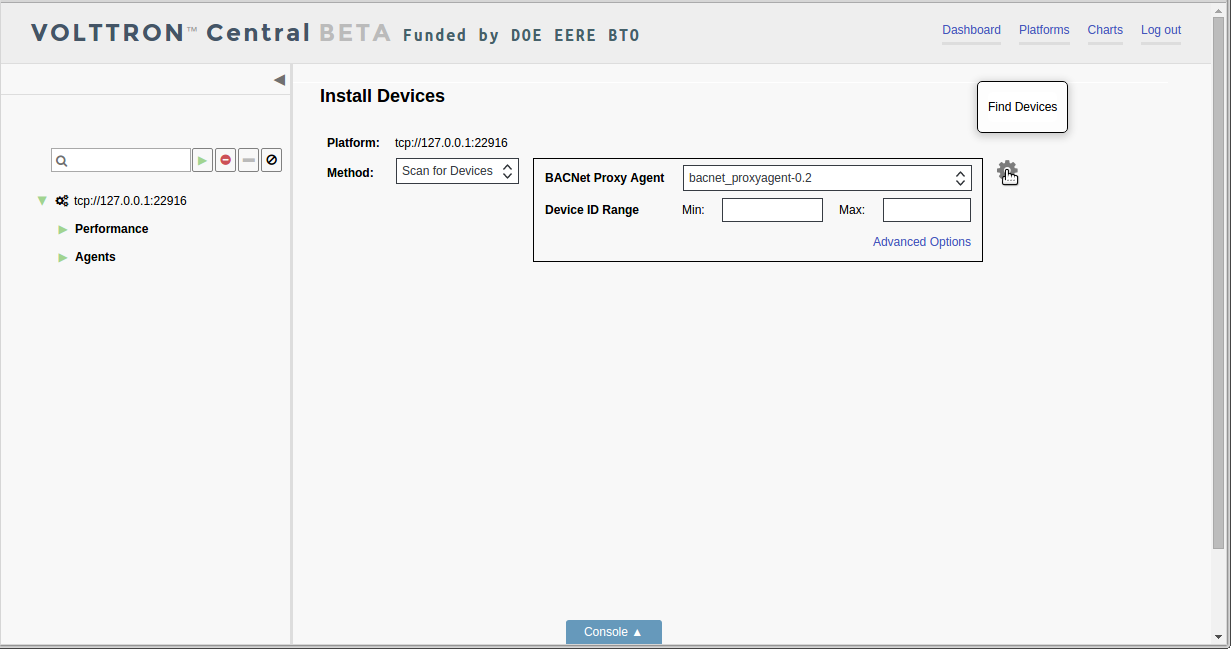
To start the scan, click the large cog button to the right of the scan settings.
Devices that are detected will appear in the space below the scan settings. Scanning can be repeated at any time by clicking the large cog button again.
Scanning for Points
Another scan can be performed on each physical device to retrieve its available points. This scan is initiated by clicking the triangle next to the device in the list. The first time the arrow is clicked, it initiates the scan. After the points are retrieved, the arrow becomes a hide-and-show toggle button and won’t re-initiate scanning the device.
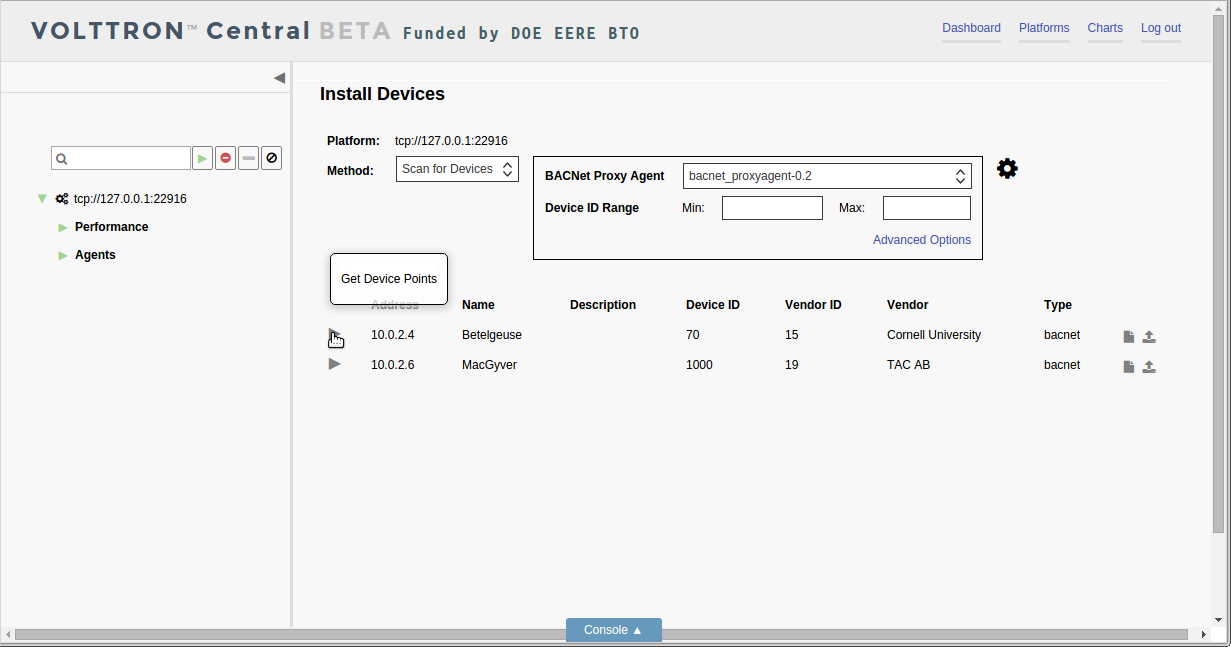
After the points have been retrieved once, the only way to scan the same device for points again is to relaunch the device configuration process from the start by clicking on the small cogs button next to the platform instance in the panel tree.
Registry Configuration File
The registry configuration determines which points on the physical device will be associated with the virtual device that uses that particular registry configuration. The registry configuration determines which points’ data will be published to the message bus and recorded by the historian, and it determines how the data will be presented.
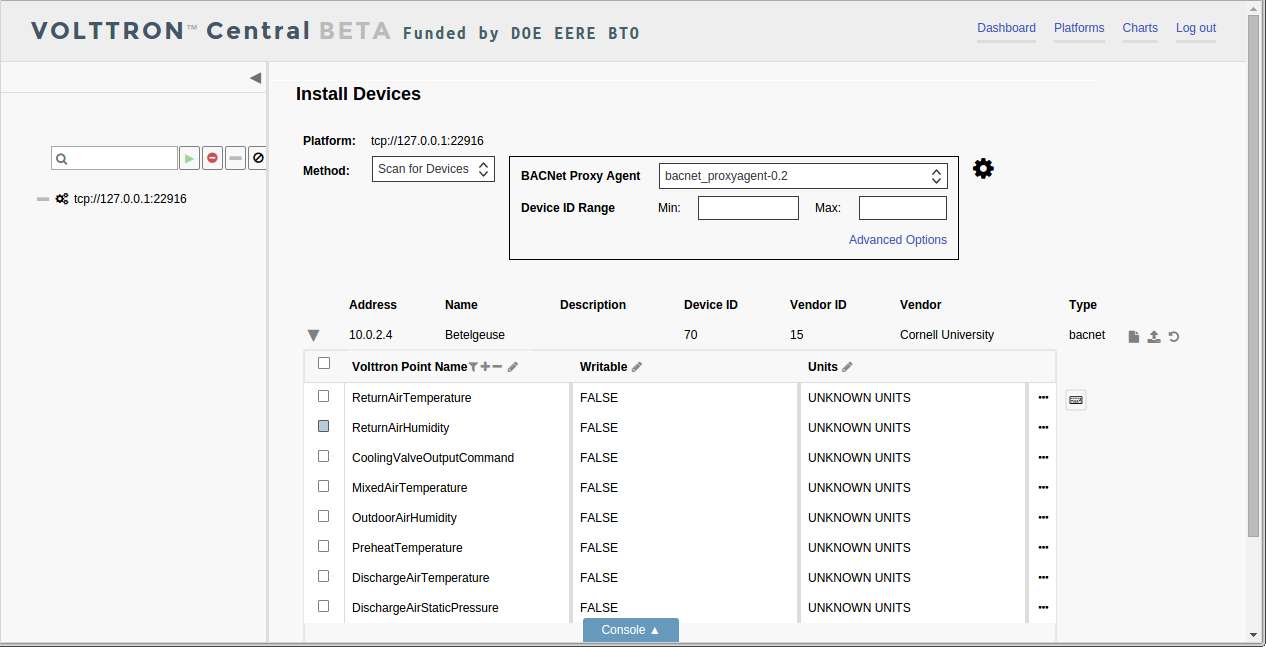
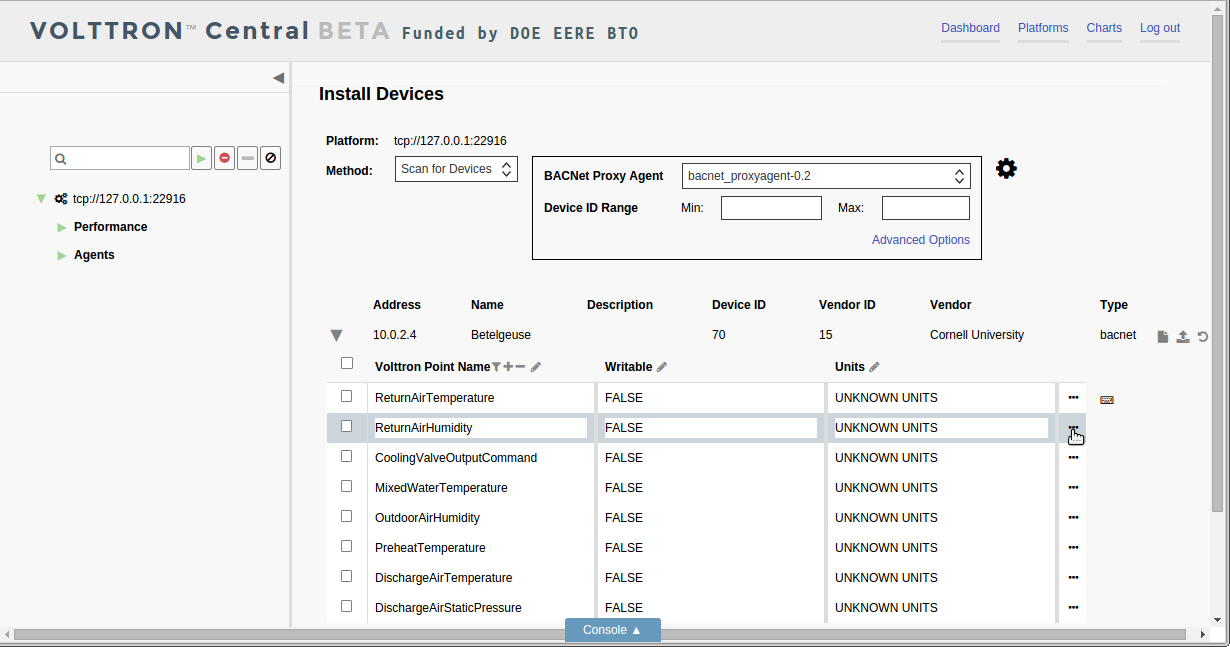
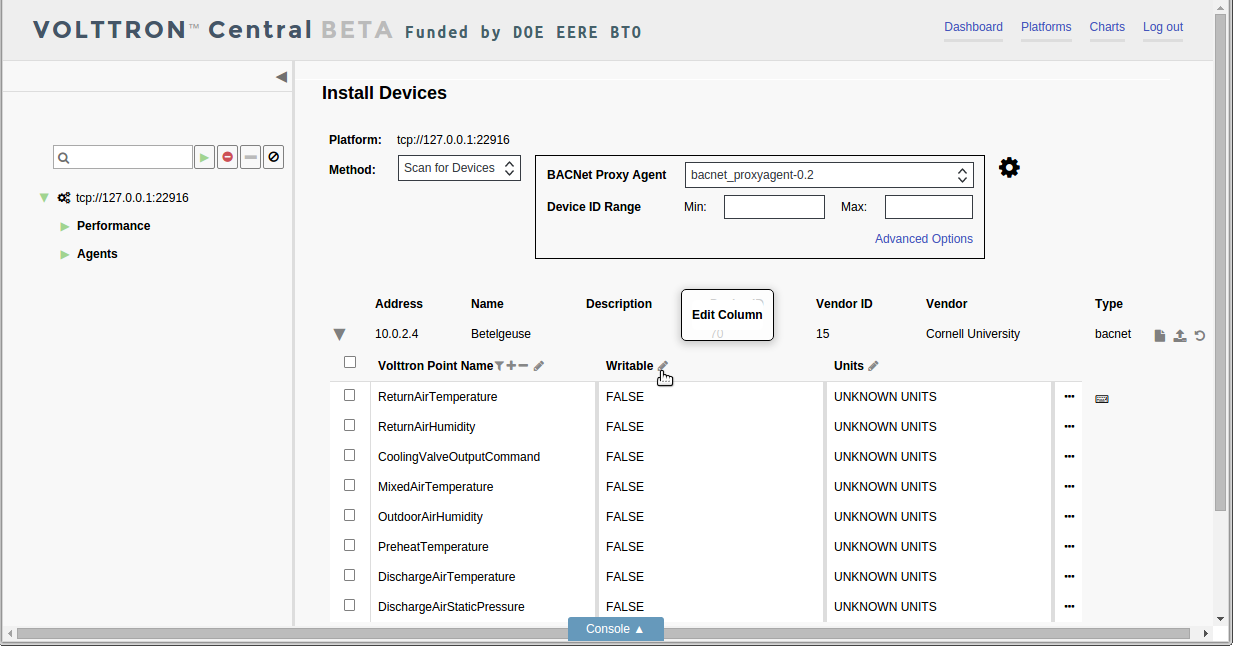
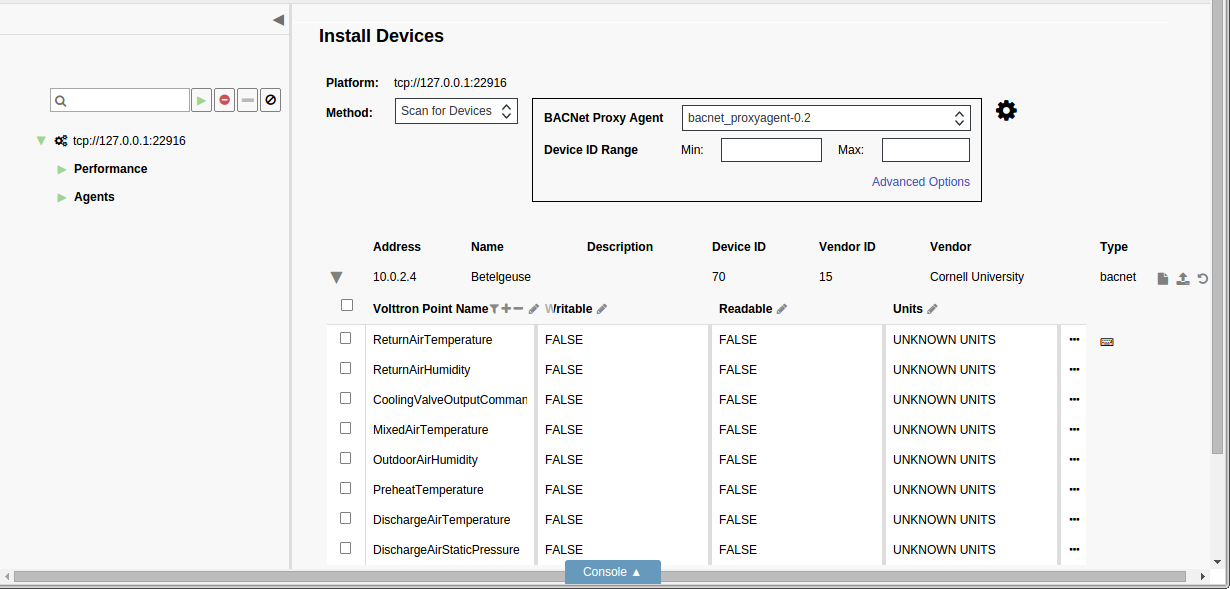
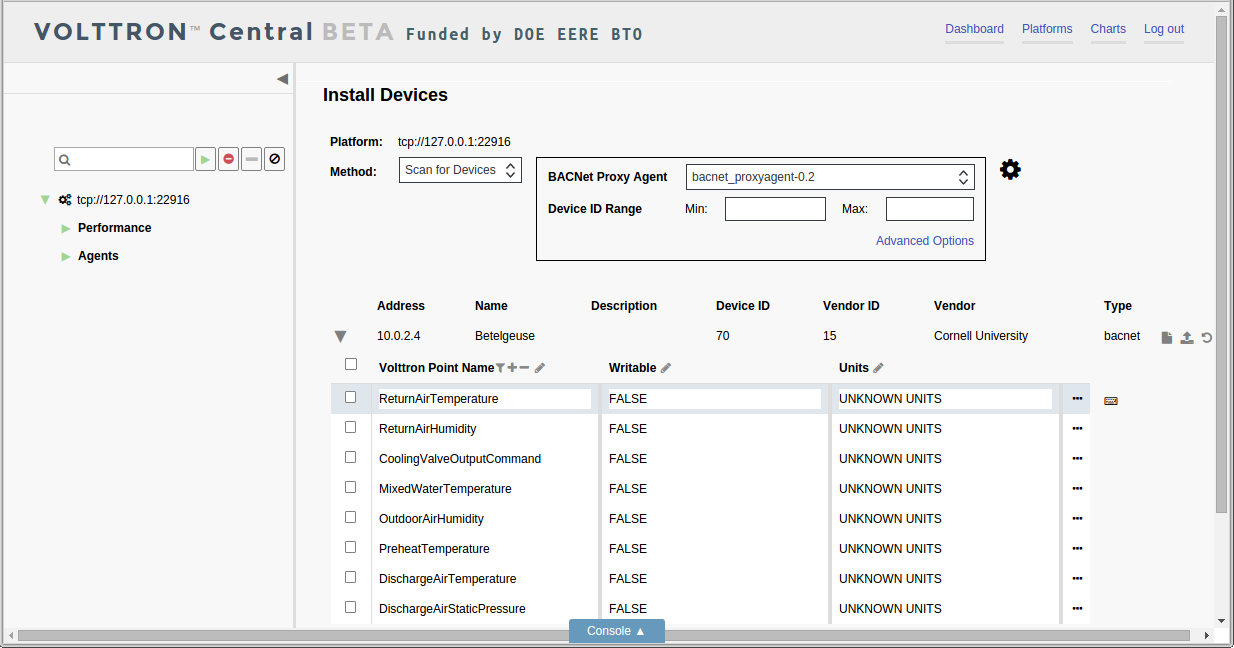
When all the points on the device have been retrieved, the points are loaded into the registry configuration editor. There, the points can be modified and selected to go into the registry configuration file for a device.
Each row in the registry configuration editor represents a point, and each cell in the row represents an attribute of the point.
Only points that have been selected will be included in the registry configuration file. To select a point, check the box next to the point in the editor.


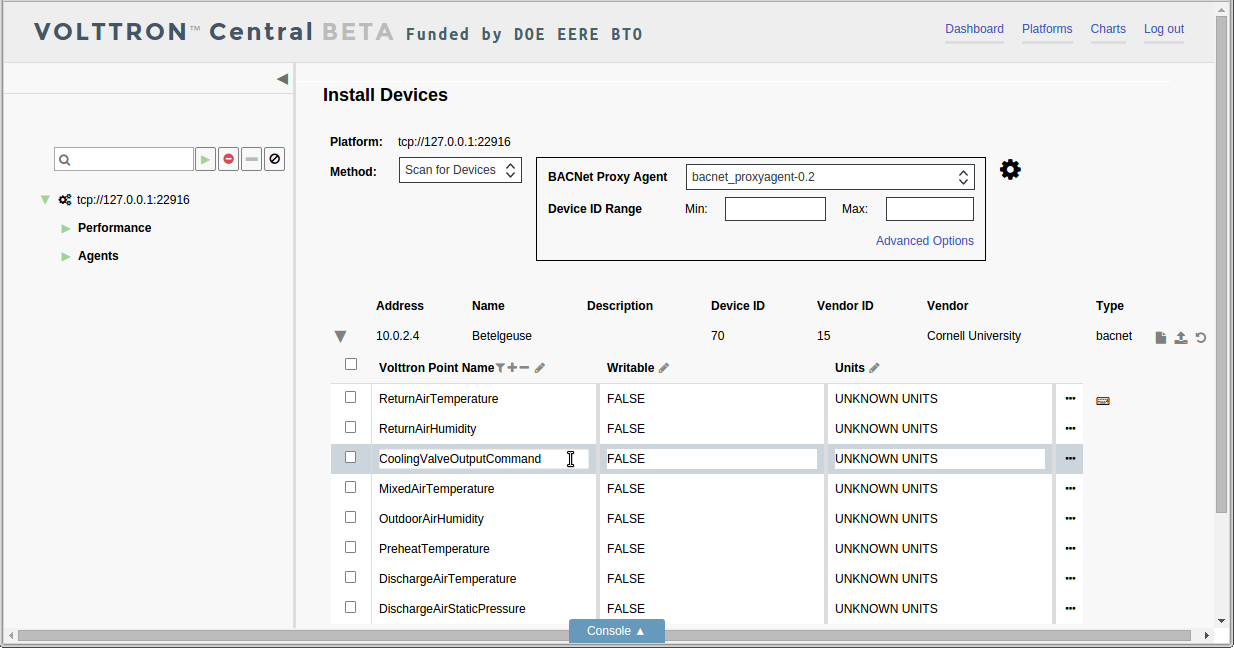
Type directly in a cell to change an attribute value for a point.
Additional Attributes
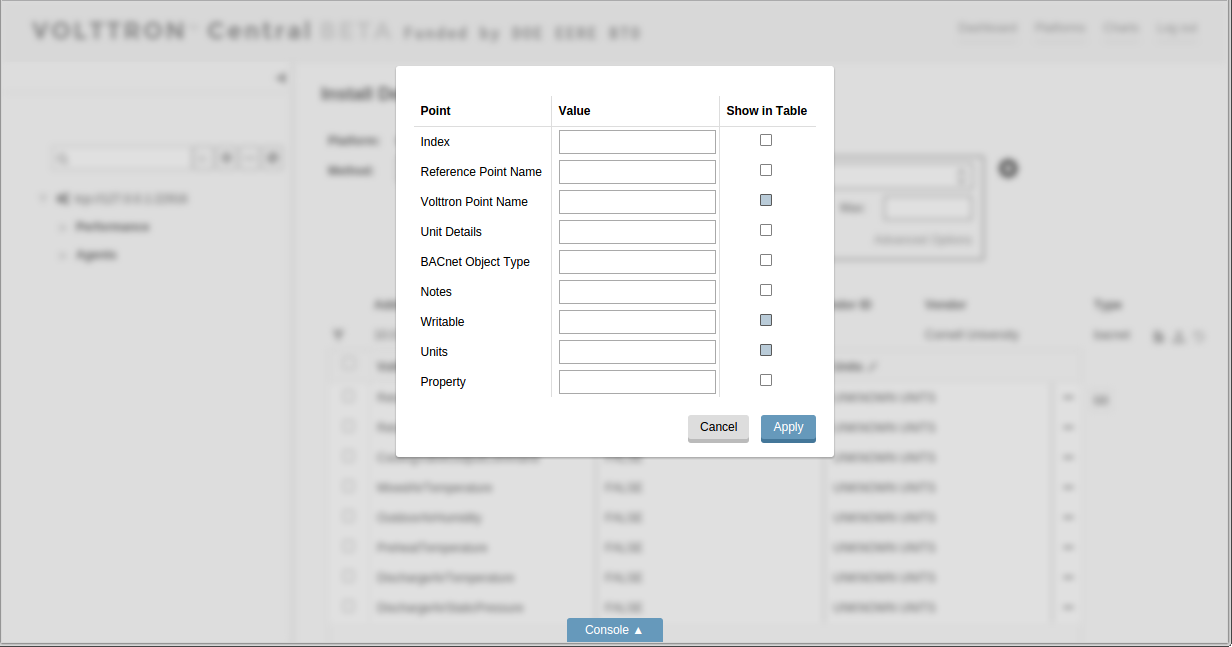
The editor’s default view shows the attributes that are most likely to be changed during configuration: the VOLTTRON point name, the writable setting, and the units. Other attributes are present but not shown in the default view. To see the entire set of attributes for a point, click the Edit Point button (the three dots) at the end of the point row.
In the window that opens, point attributes can be changed by typing in the fields and clicking the Apply button.
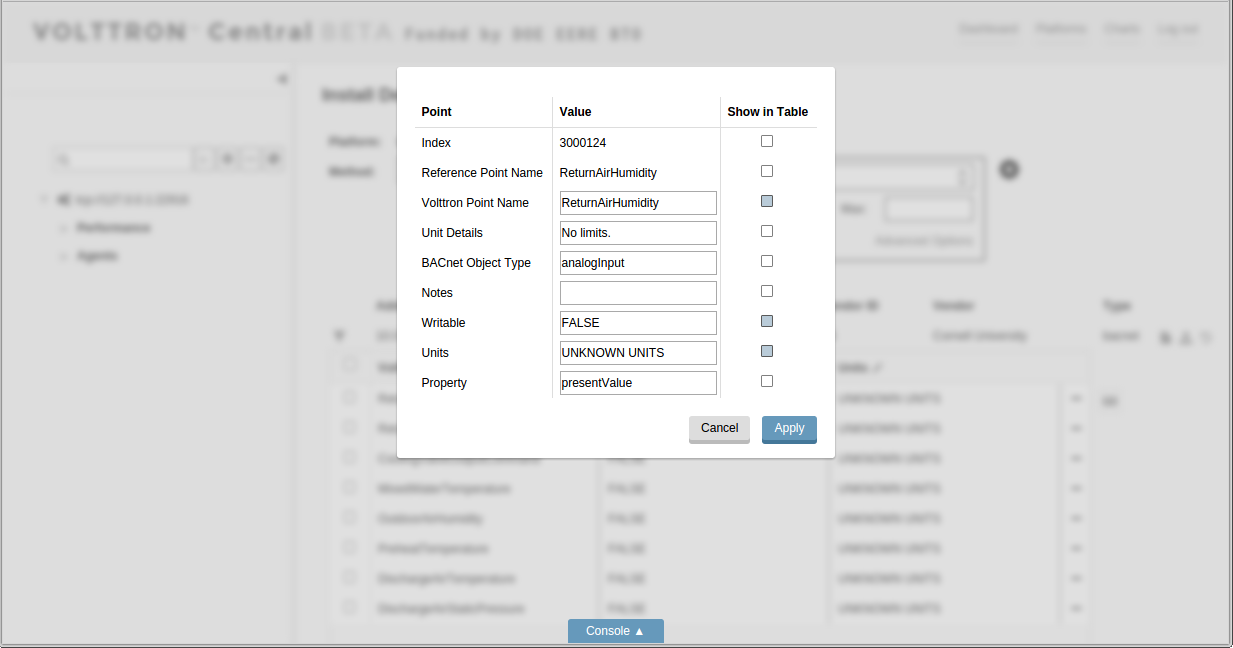
Checking or unchecking the Show in Table box for an attribute will add or remove it as a column in the registry configuration editor.
Quick Edit Features
Several quick-edit features are available in the registry configuration editor.
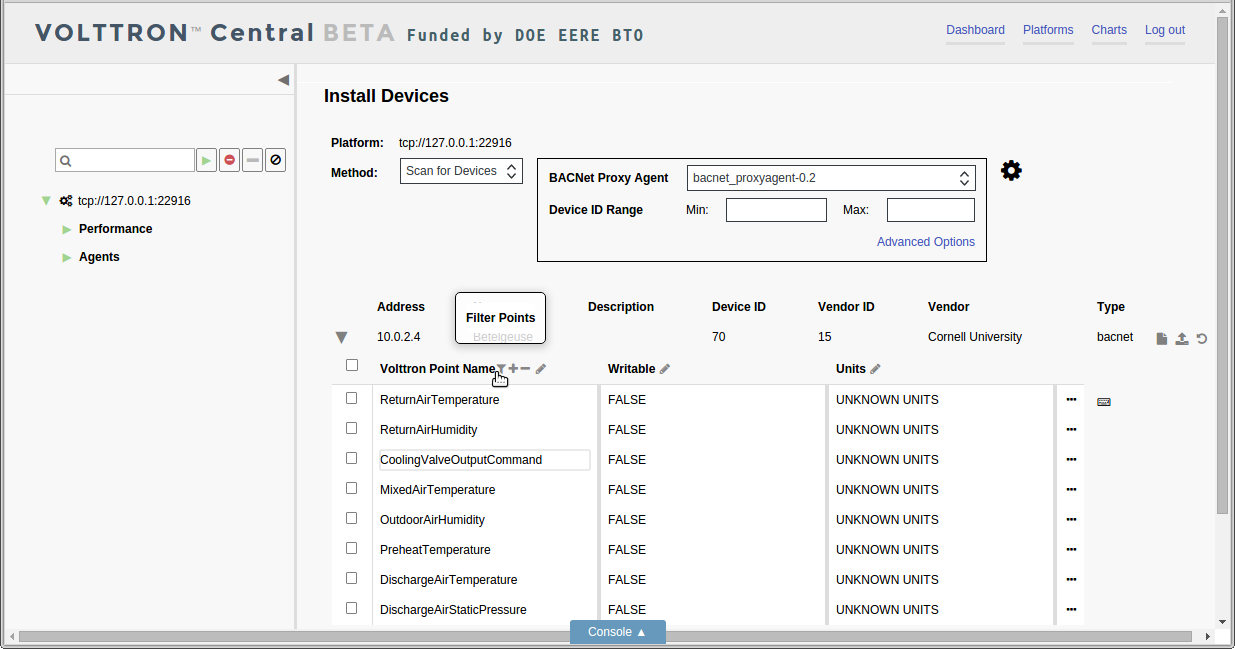
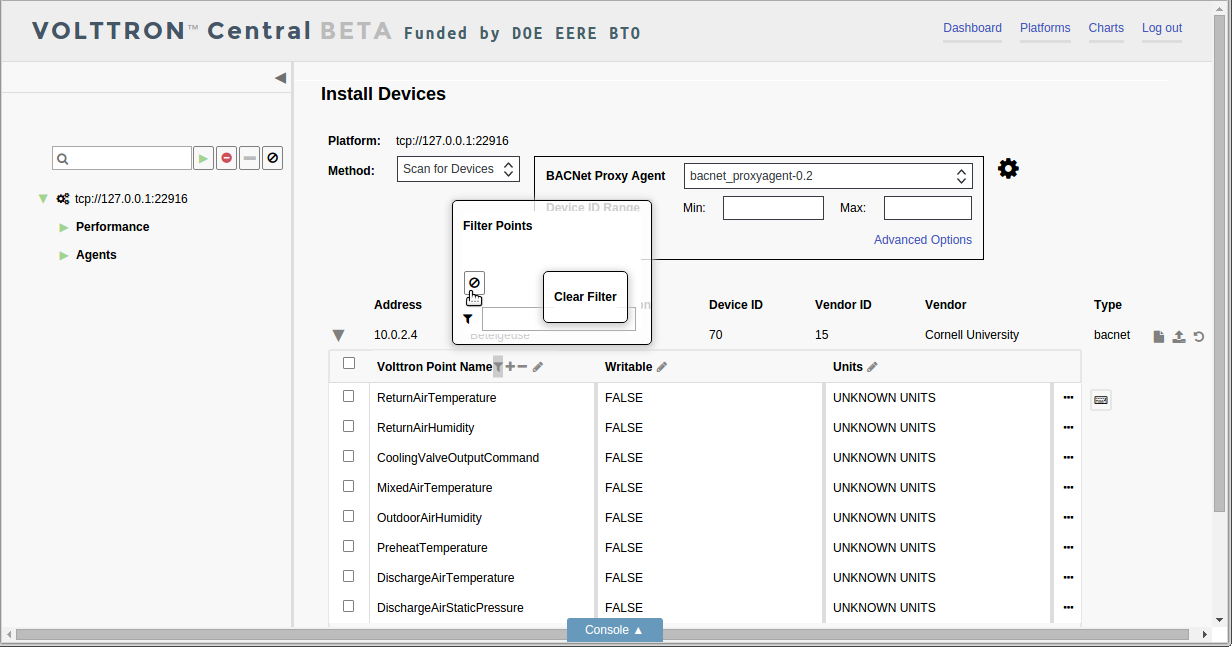
The list of points can be filtered based on values in the first column by clicking the filter button in the first column’s header and entering a filter term.
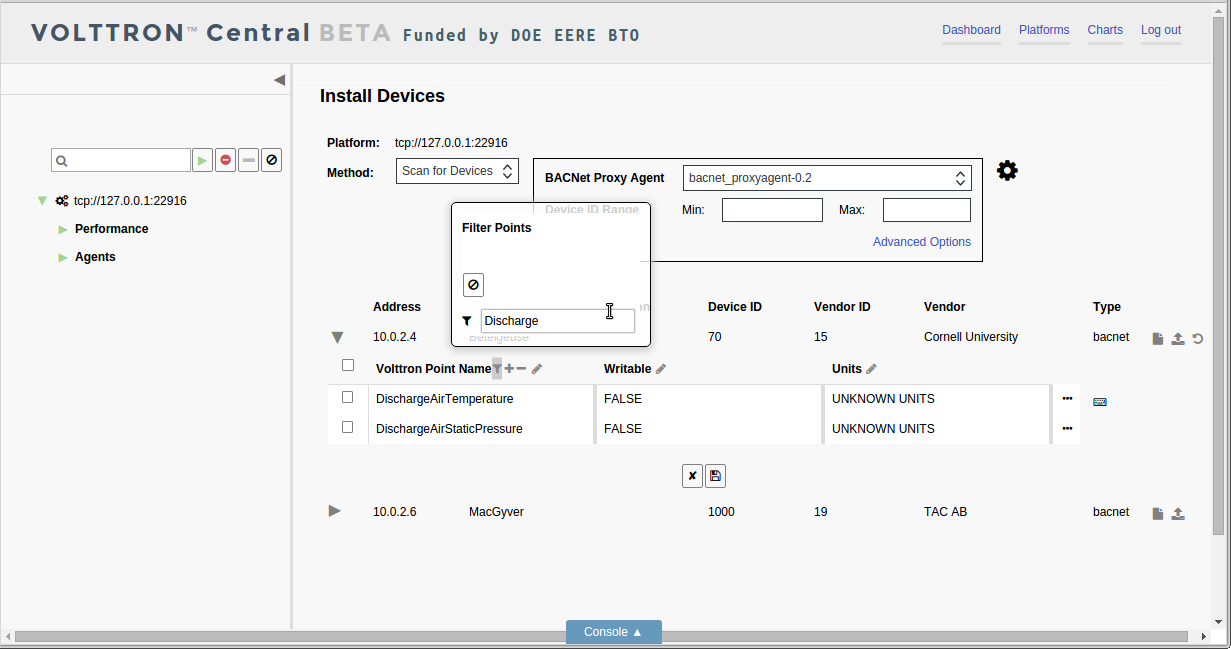
The filter feature allows points to be edited, selected, or deselected more quickly by narrowing down potentially large lists of points. However, the filter doesn’t select points, and if the registry configuration is saved while a filter is applied, any selected points not included in the filter will still be included in the registry file.
To clear the filter, click on the Clear Filter button in the filter popup.
To add a new point to the points listed in the registry configuration editor, click on the Add Point button in the header of the first column.
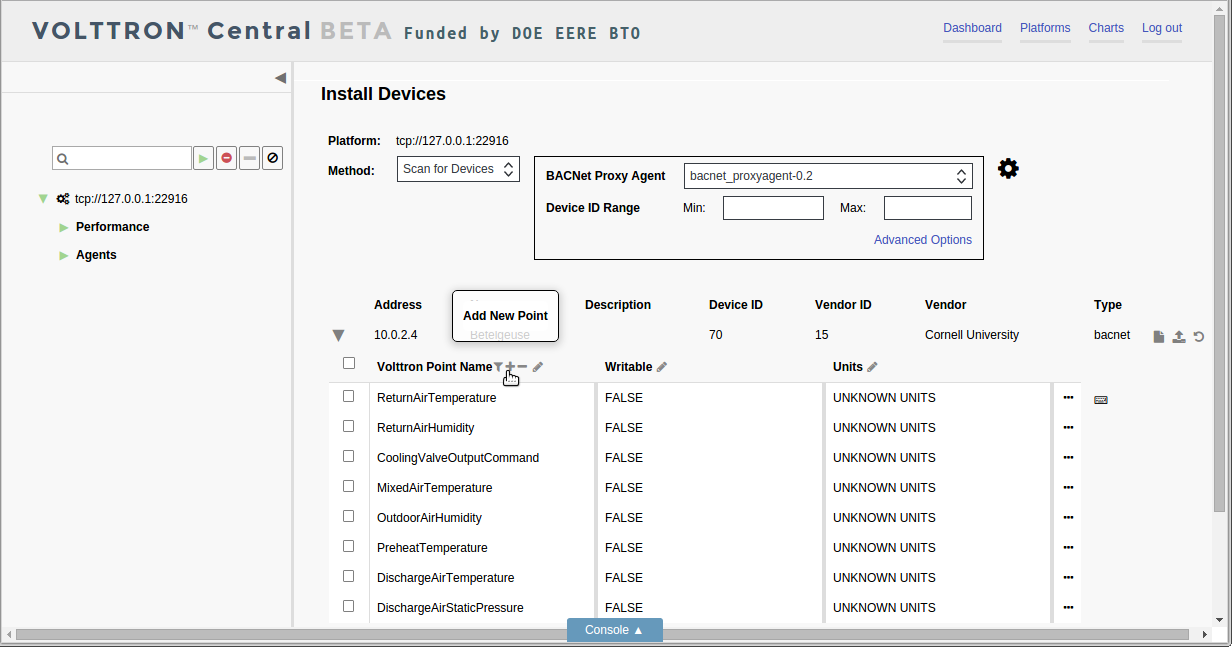
Provide attribute values, and click the Apply button to add the new point, which will be appended to the bottom of the list.
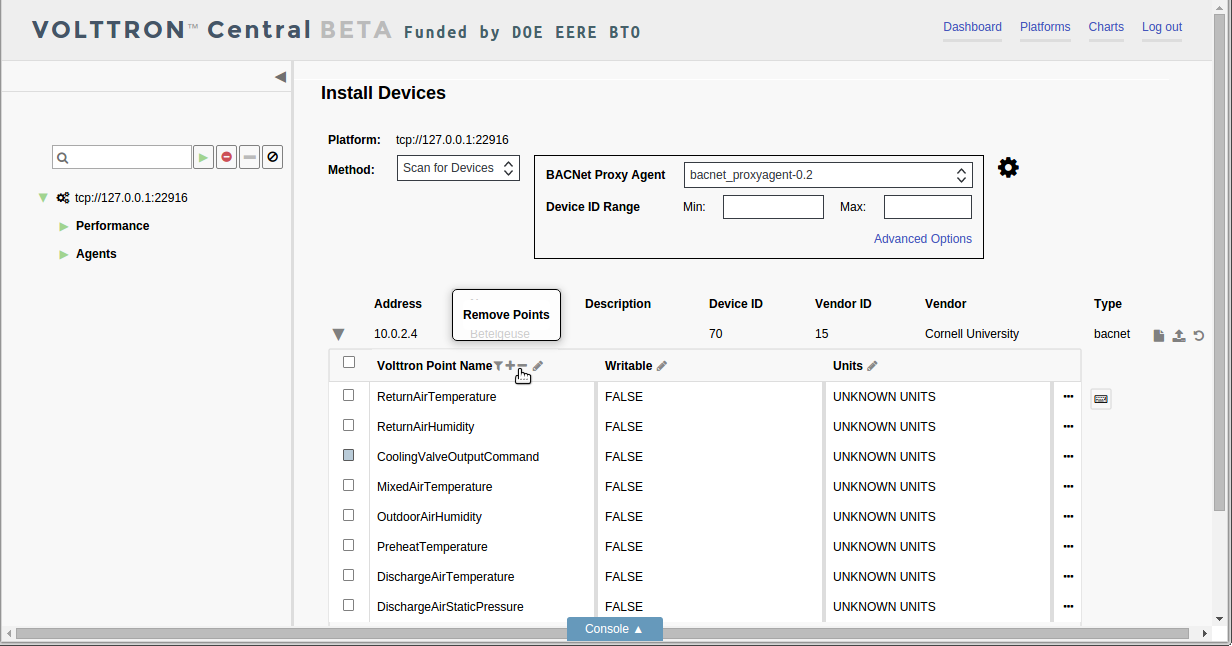
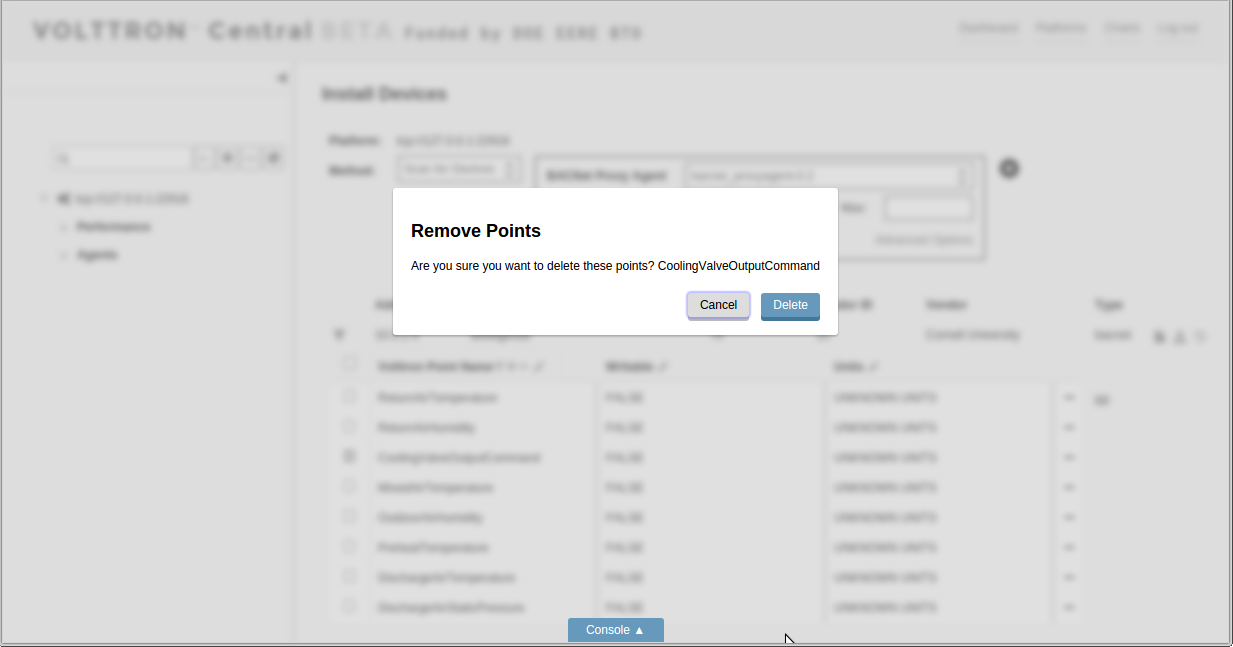
To remove points from the list, select the points and click the Remove Points button in the header of the first column.
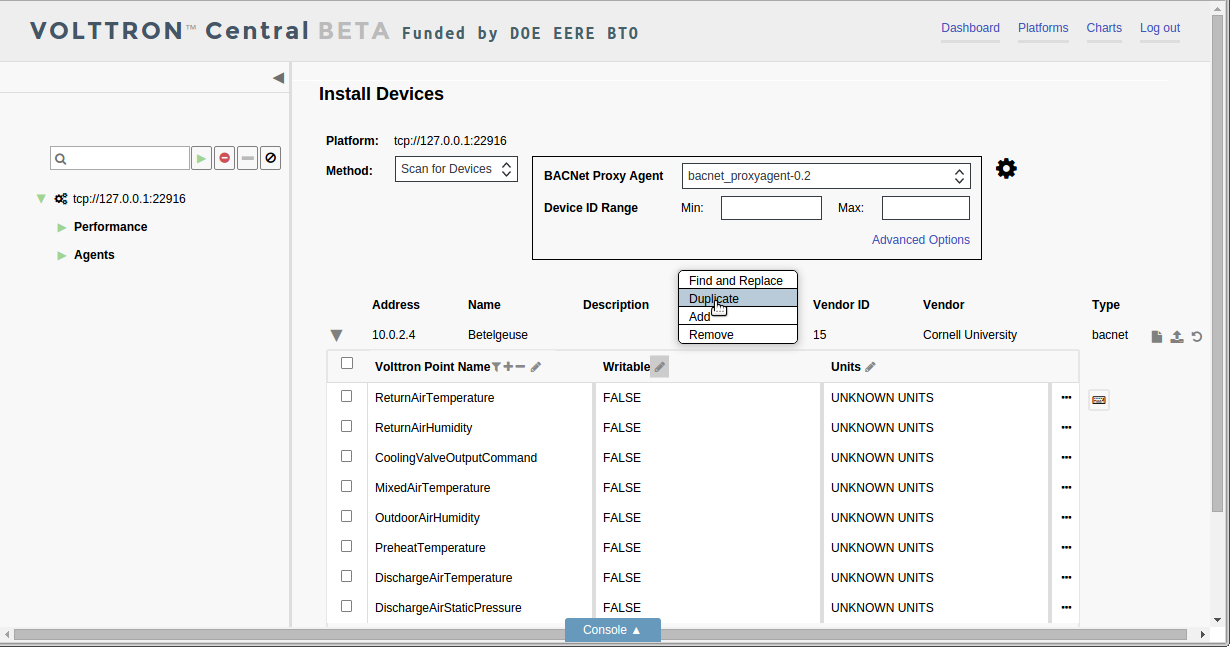
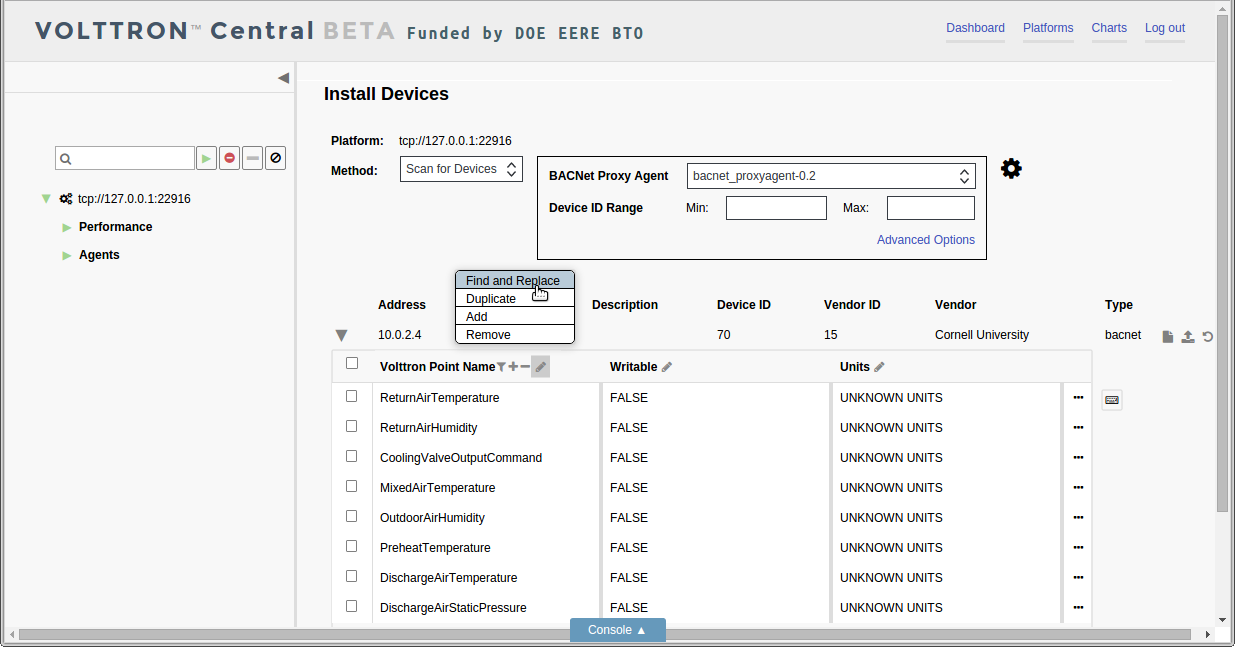
Each column has an Edit Column button in its header.
Click on the button to display a popup menu of operations to perform on the column. The options include inserting a blank new column, duplicating an existing column, removing a column, or searching for a value within a column.
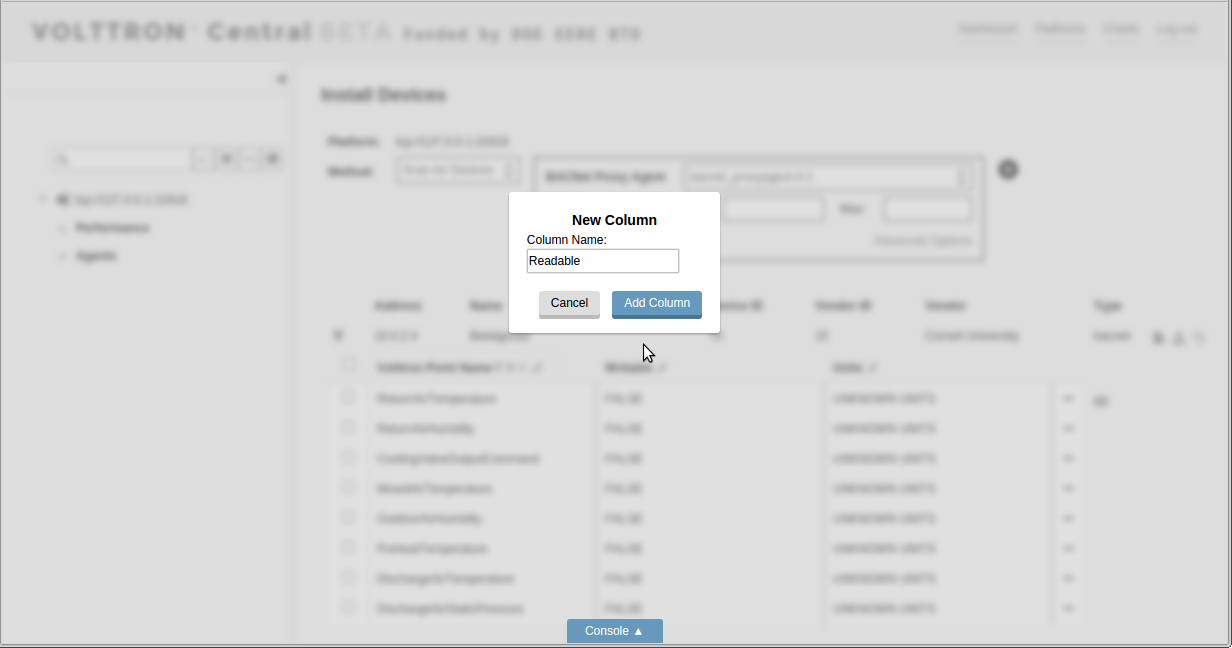
A duplicate or new column has to be given a unique name.
To search for values in a column, choose the Find and Replace option in the popup menu.
Type the term to search for, and click the Find Next button to highlight all the matched fields in the column.
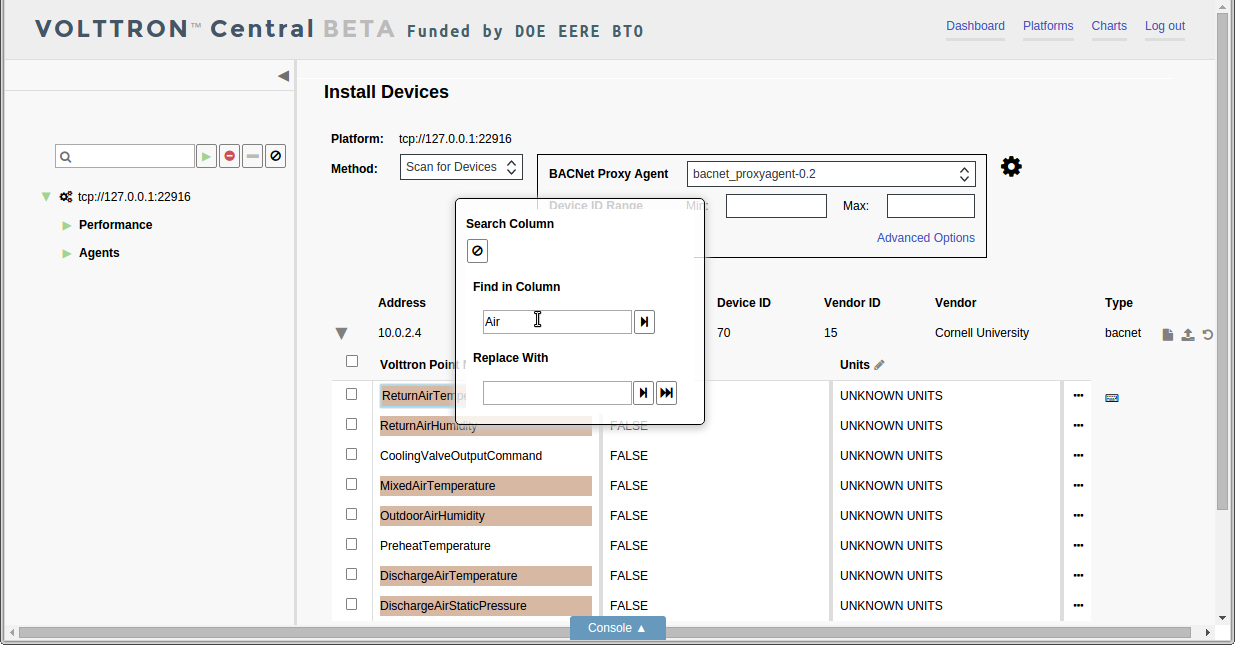
Click the Find Next button again to advance the focus down the list of matched terms.
To quickly replace the matched term in the cell with focus, type a replacement term, and click on the Replace button.
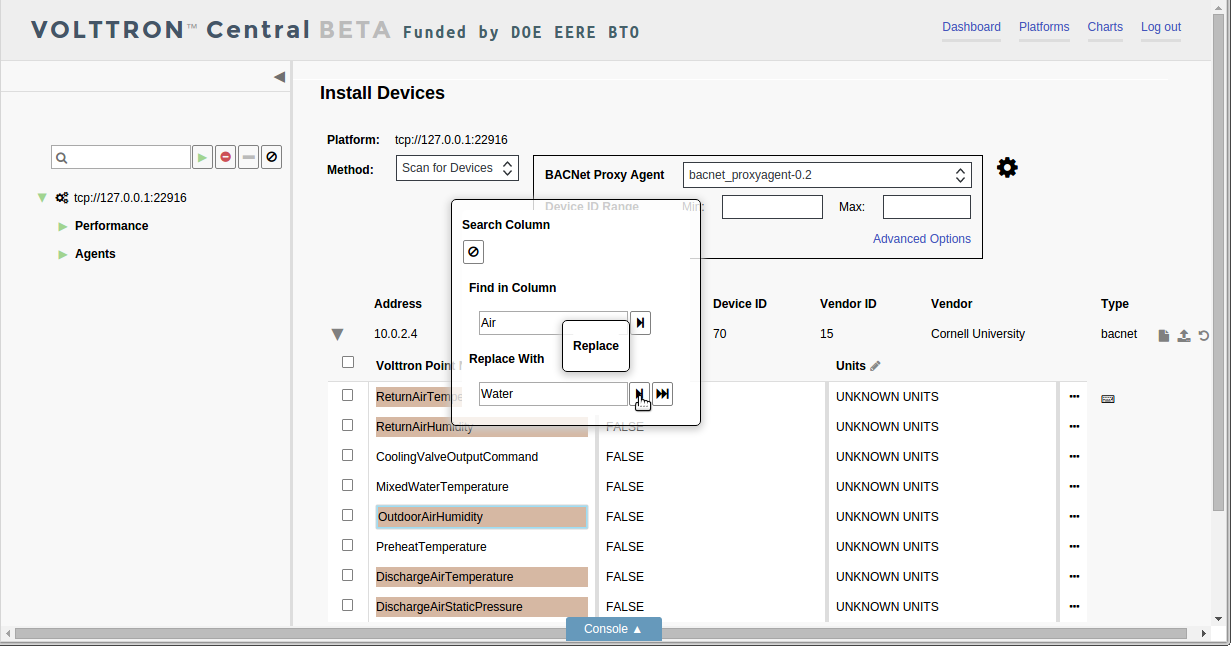
To replace all the matched terms in the column, click on the Replace All button. Click the Clear Search button to end the search.
Keyboard Commands
Some keyboard commands are available to expedite the selection or de-selection of points. To initiate use of the keyboard commands, strike the Control key on the keyboard. For keyboard commands to be activated, the registry configuration editor has to have focus, which comes from interacting with it. But the commands won’t be activated if the cursor is in a type-able field.
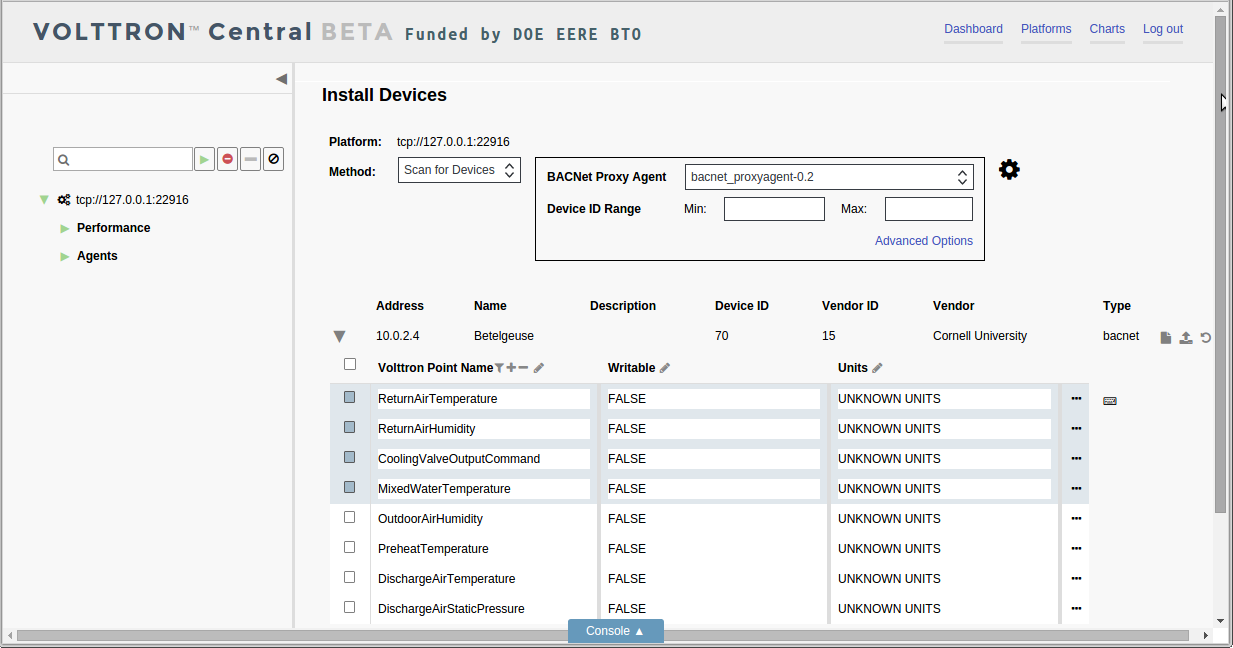
If the keyboard commands have been successfully activated, a faint highlight will appear over the first row in the registry configuration editor.
Keyboard commands are deactivated when the mouse cursor moves over the configuration editor. If unintentional deactivation occurs, strike the Control key again to reactivate the commands.
With keyboard commands activated, the highlighted row can be advanced up or down by striking the up or down arrow on the keyboard. A group of rows can be highlighted by striking the up or down arrow while holding down the Shift key.
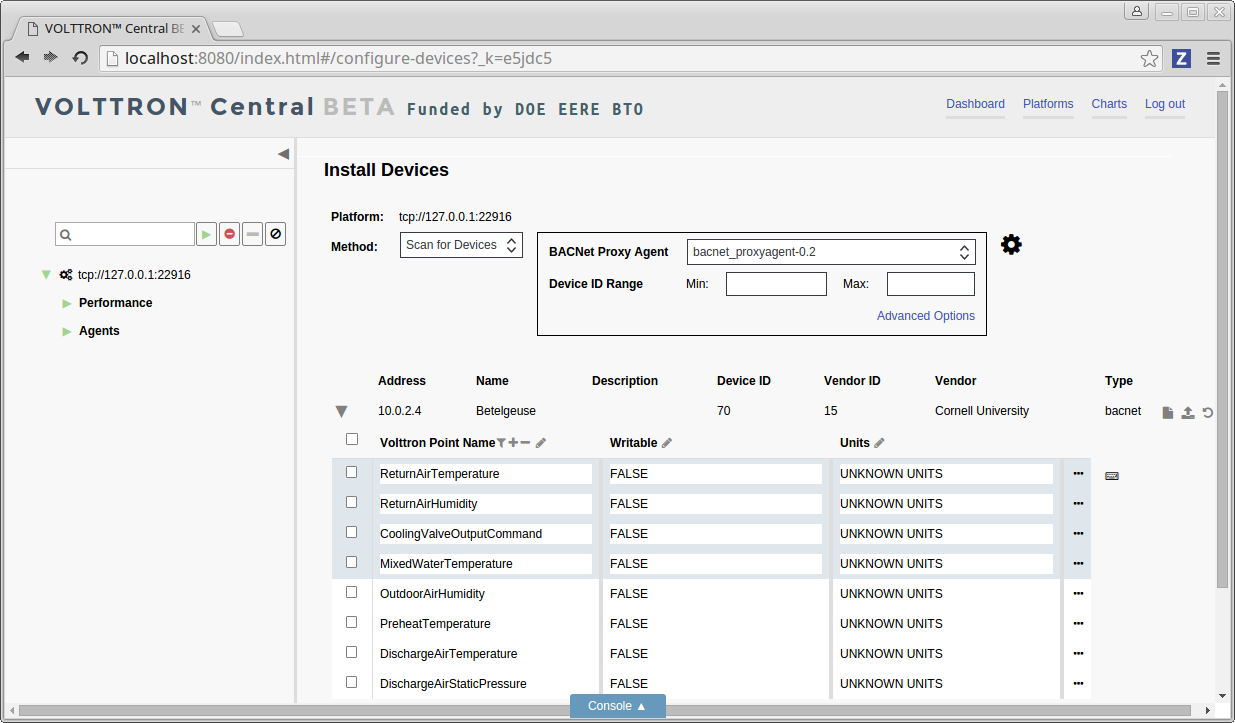
To select the highlighted rows, strike the Enter key.
Striking the Enter key with rows highlighted will also deselect any rows that were already selected.
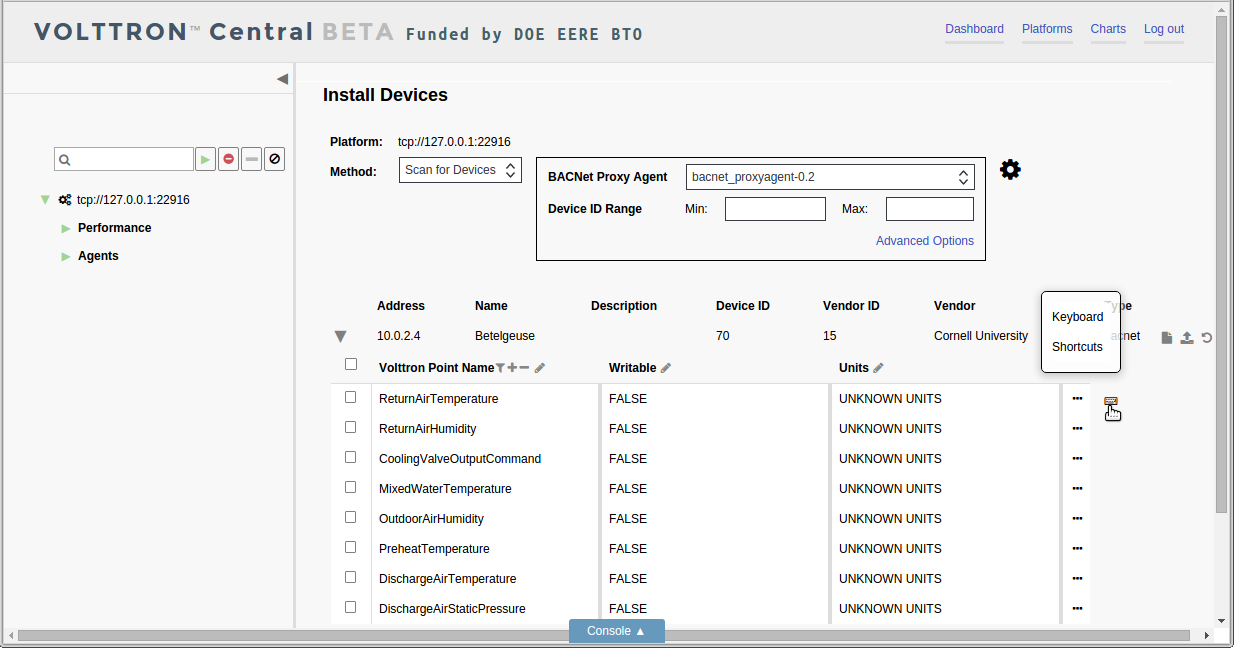
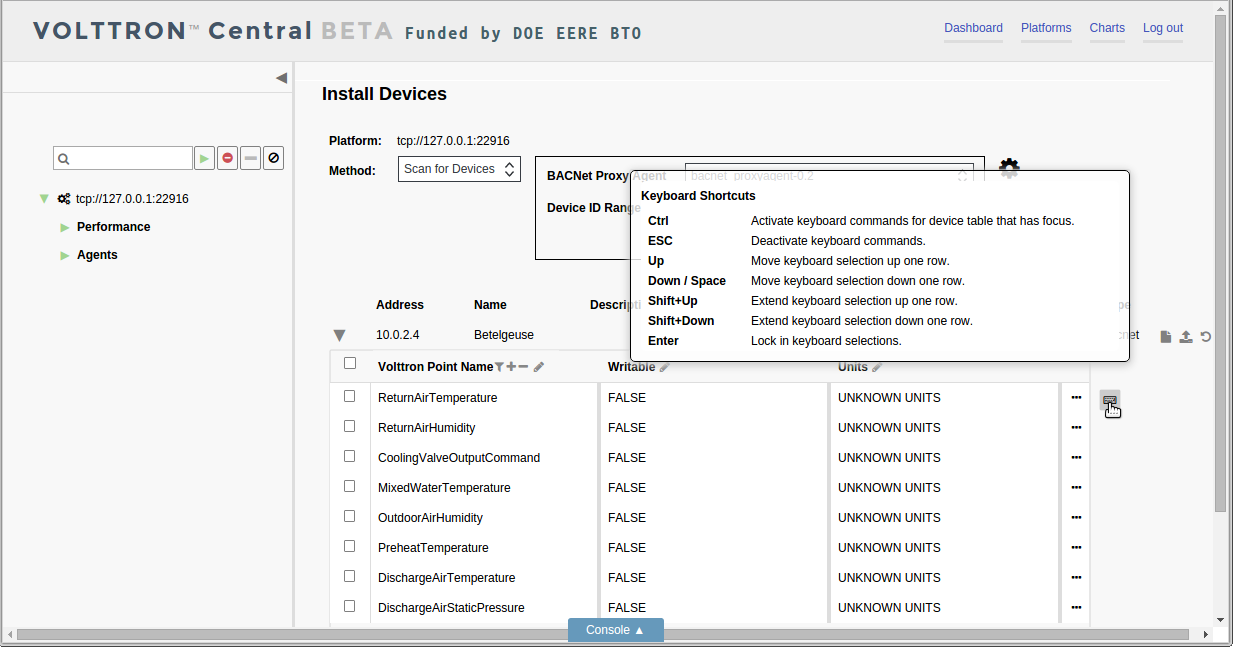
Click on the Keyboard Shortcuts button to show a popup list of the available keyboard commands.
Registry Preview
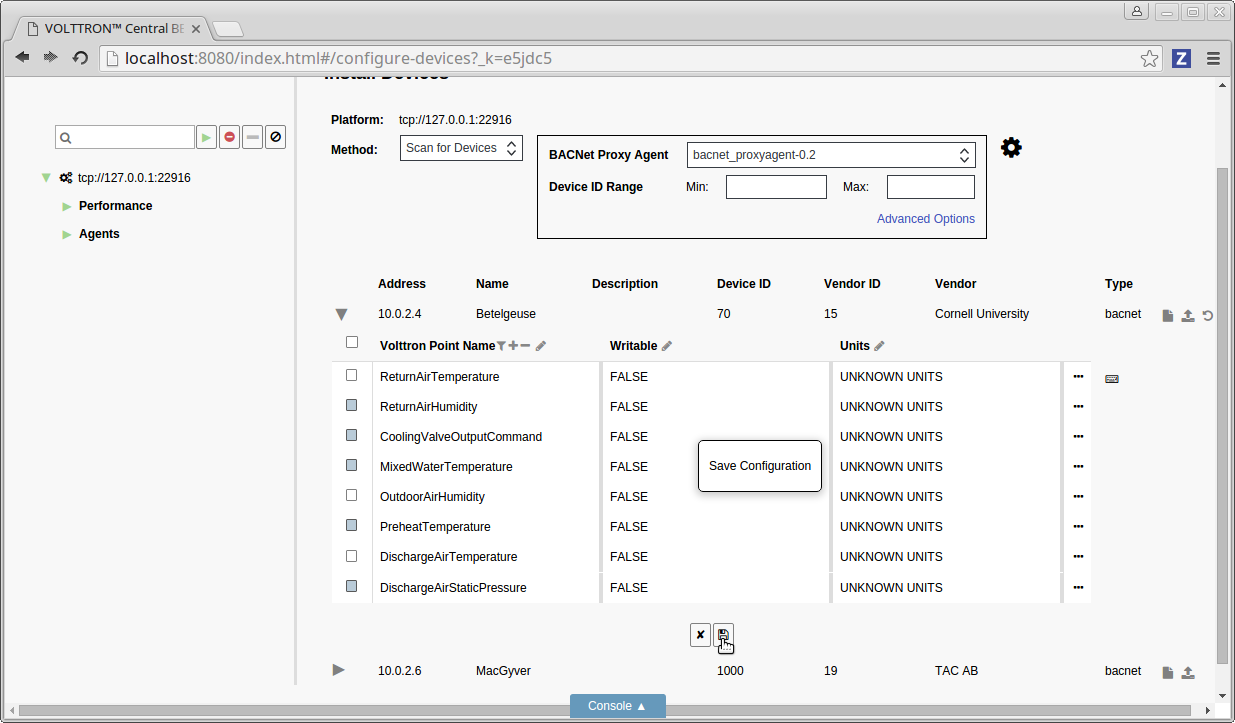
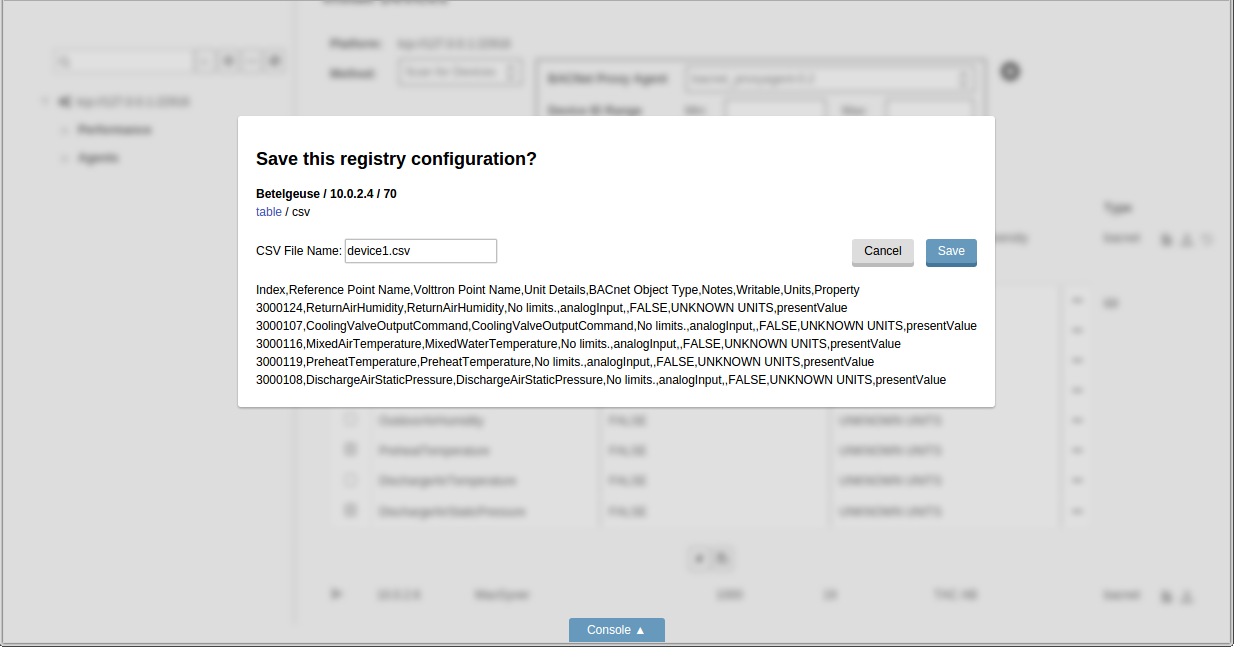
To save the registry configuration, click the Save button at the bottom of the registry configuration editor.
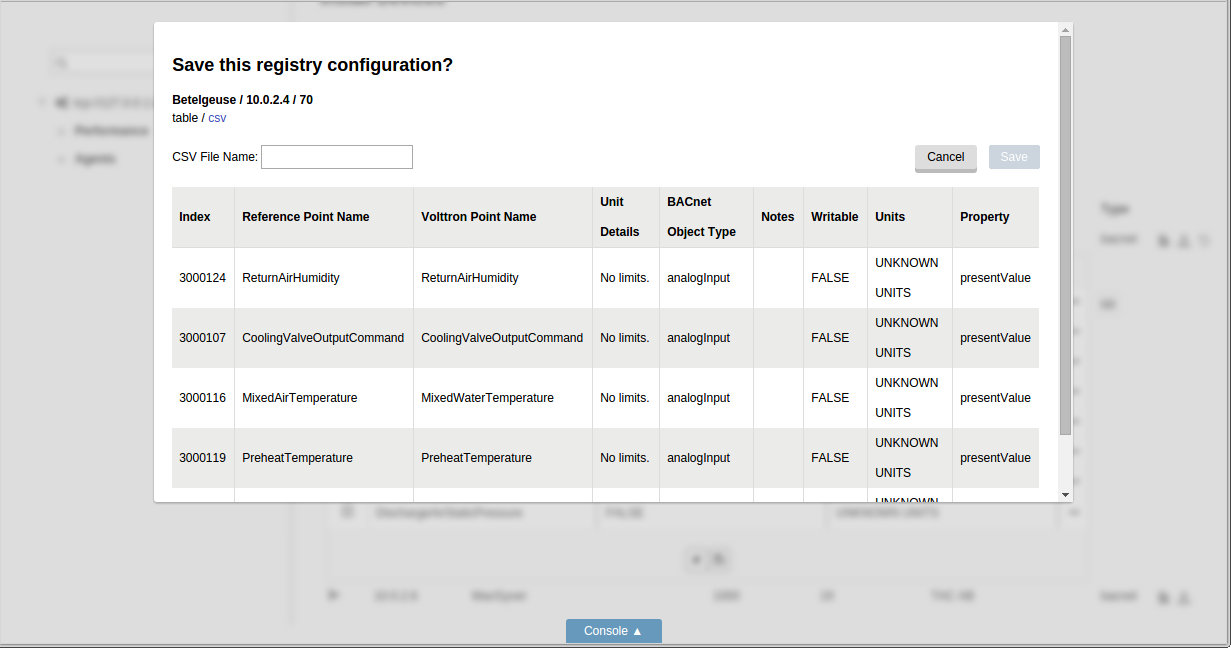
A preview will appear to let you confirm that the configuration is what you intended.
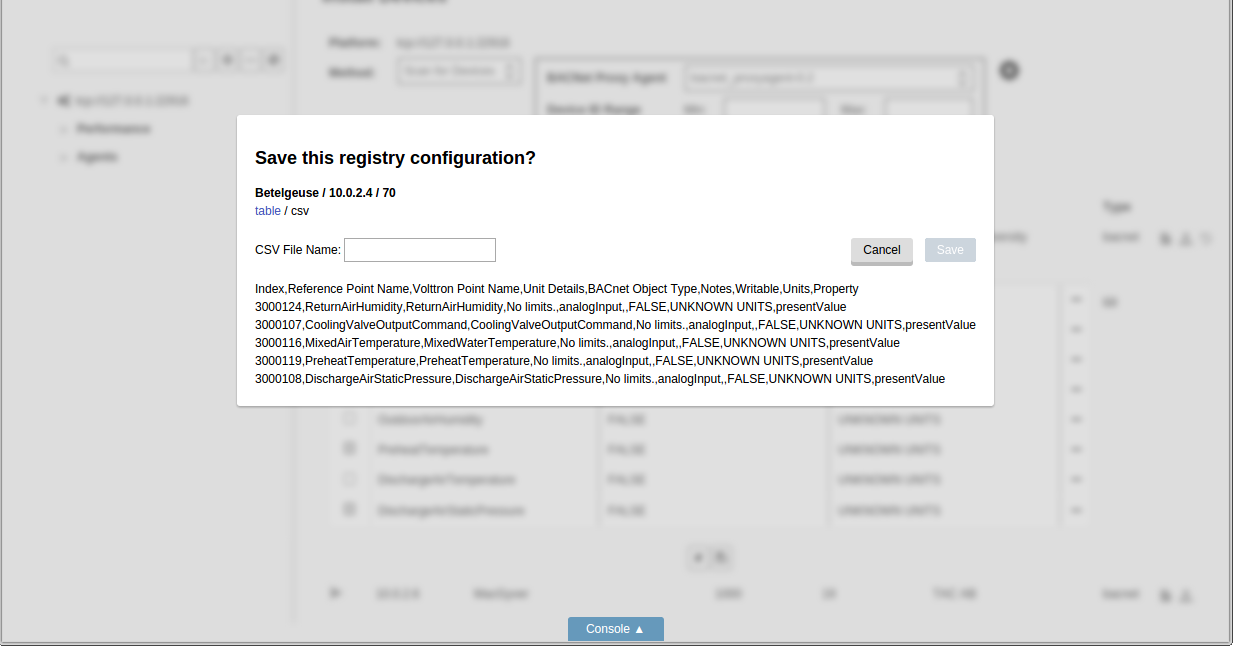
The configuration also can be inspected in the comma-separated format of the actual registry configuration file.
Provide a name for the registry configuration file, and click the Save button to save the file.
Registry Configuration Options
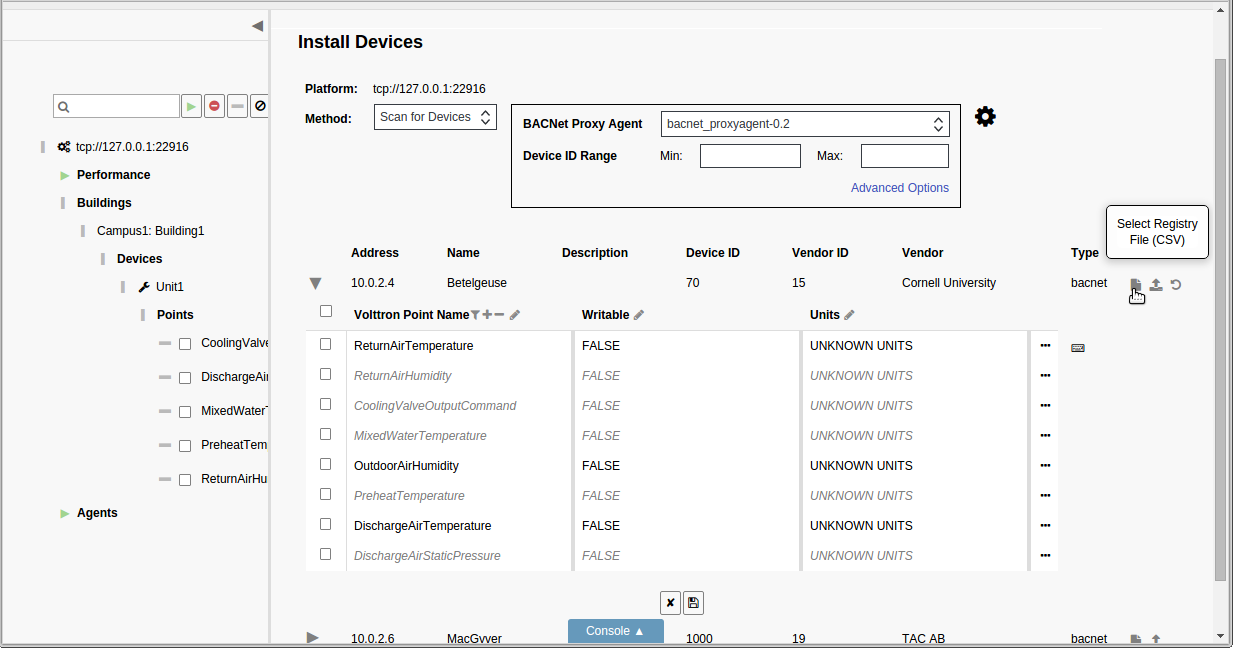
Different subsets of configured points can be saved from the same physical device and used to create separate registry files for multiple virtual devices and sub-devices. Likewise, a single registry file can be reused by multiple virtual devices and sub-devices.
To reuse a previously saved registry file, click on the Select Registry File (CSV) button at the end of the physical device’s listing.
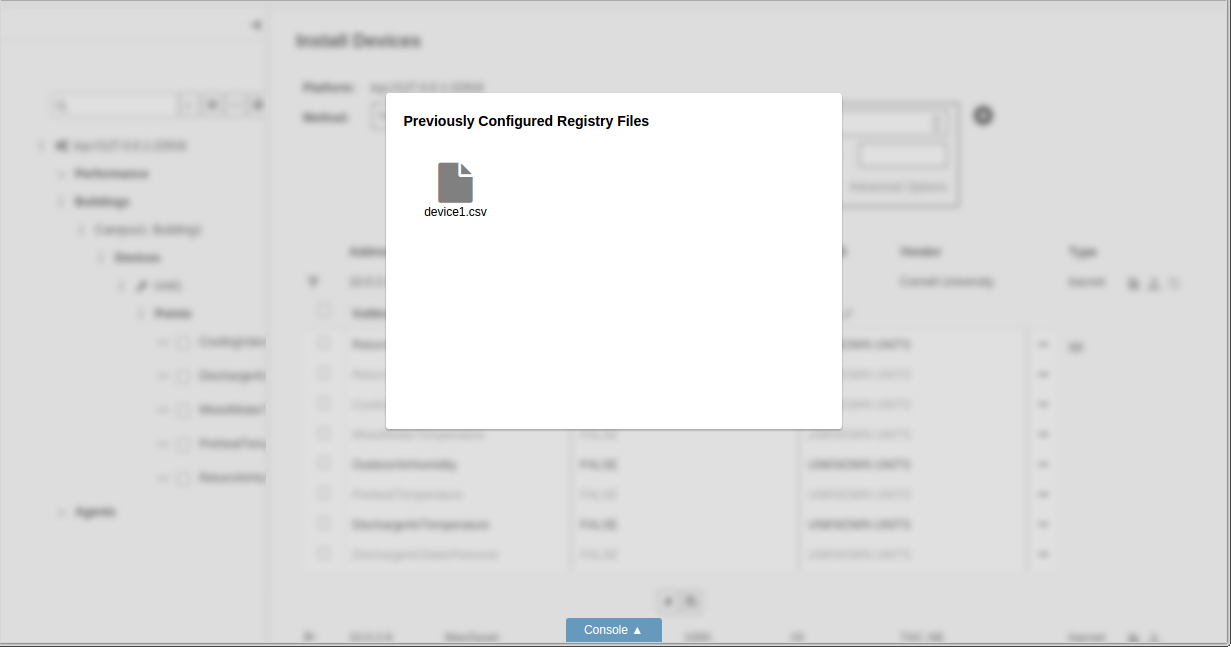
The Previously Configured Registry Files window will appear, and a file can be selected to load it into the registry configuration editor.
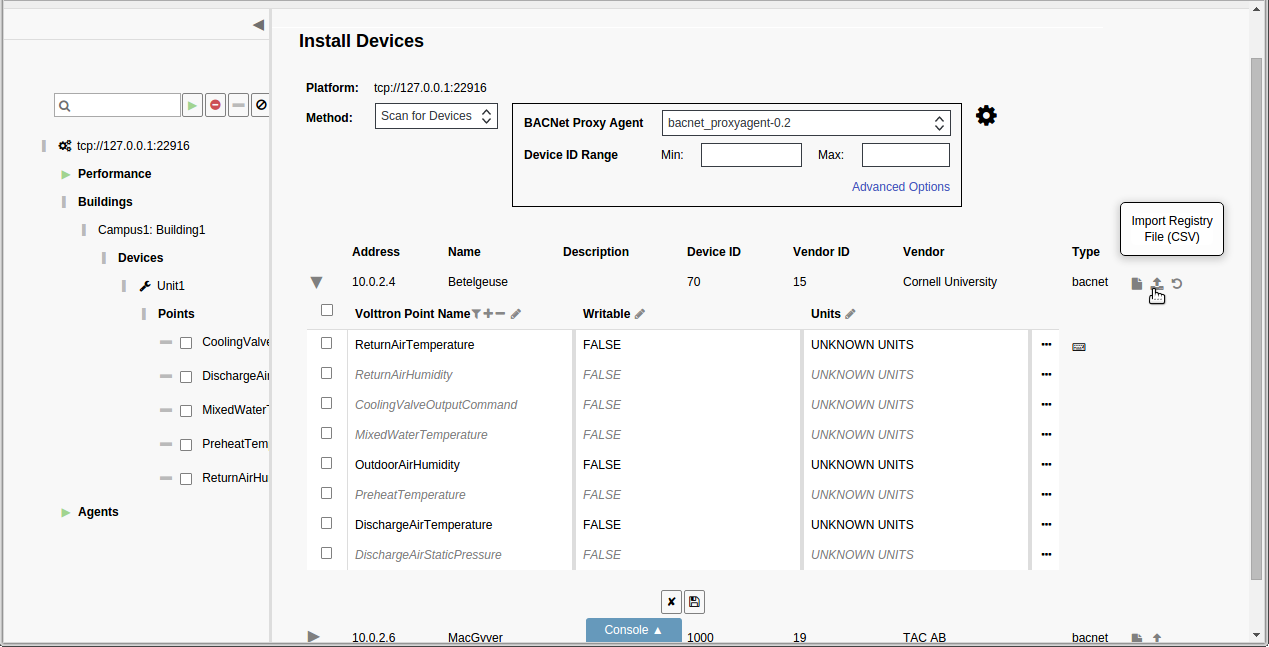
Another option is to import a registry configuration file from the computer running the VOLTTRON Central web application, if one has been saved to local storage connected to the computer. To import a registry configuration file from local storage, click on the Import Registry File (CSV) button at the end of the physical device’s listing, and use the file selector window to locate and load the file.
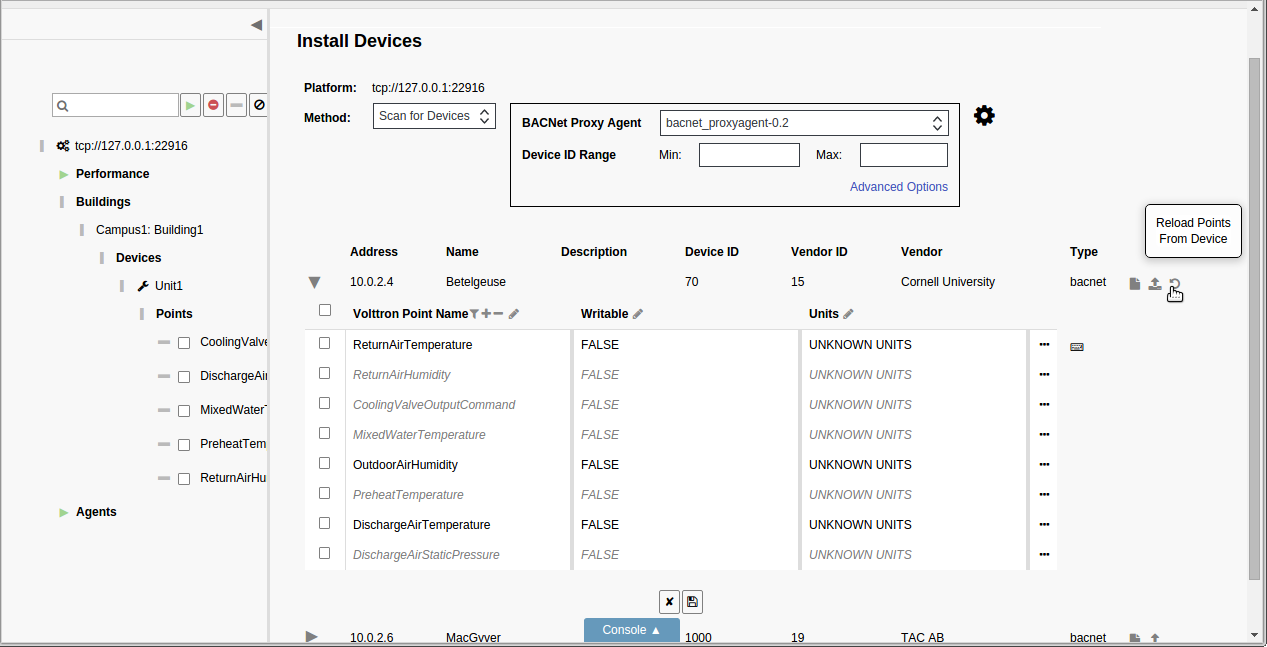
Reloading Device Points
Once a physical device has been scanned, the original points from the scan can be reloaded at any point during device configuration by clicking on the Reload Points From Device button at the end of the device’s listing.
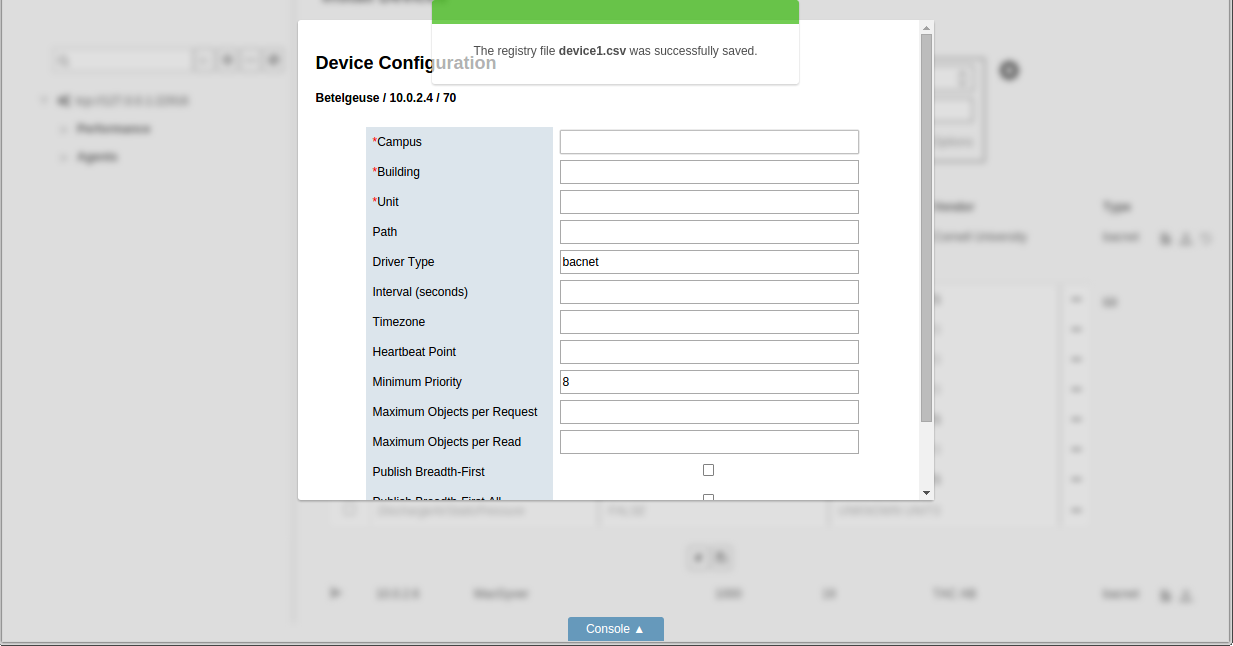
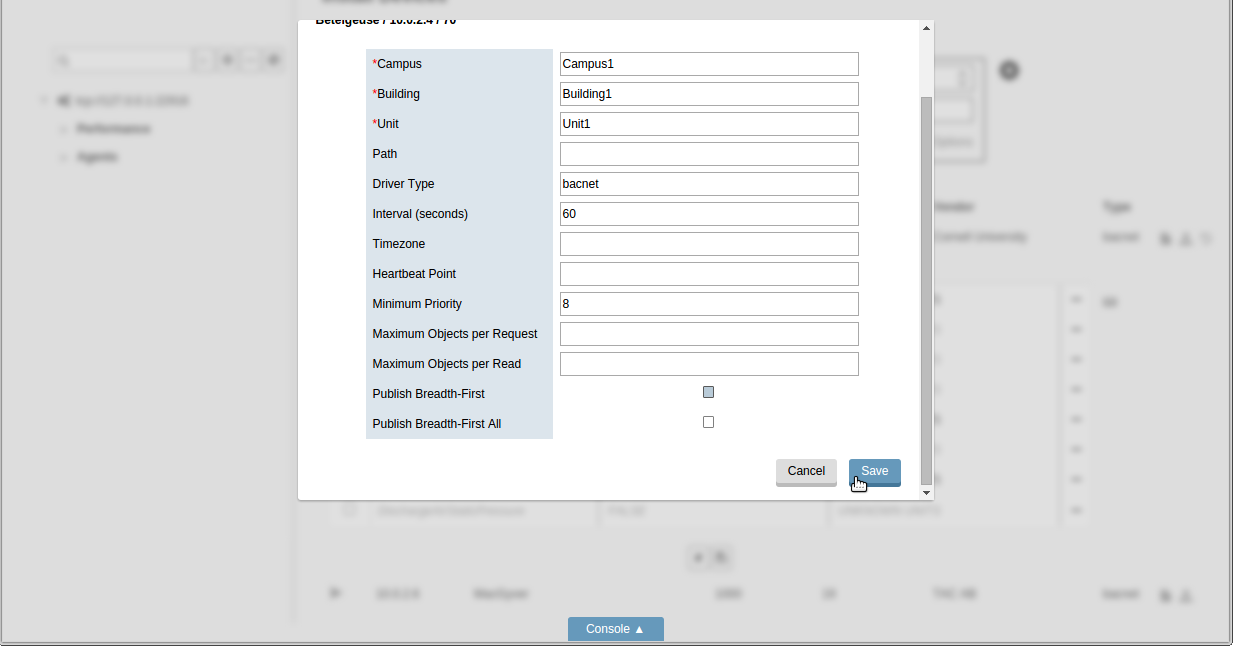
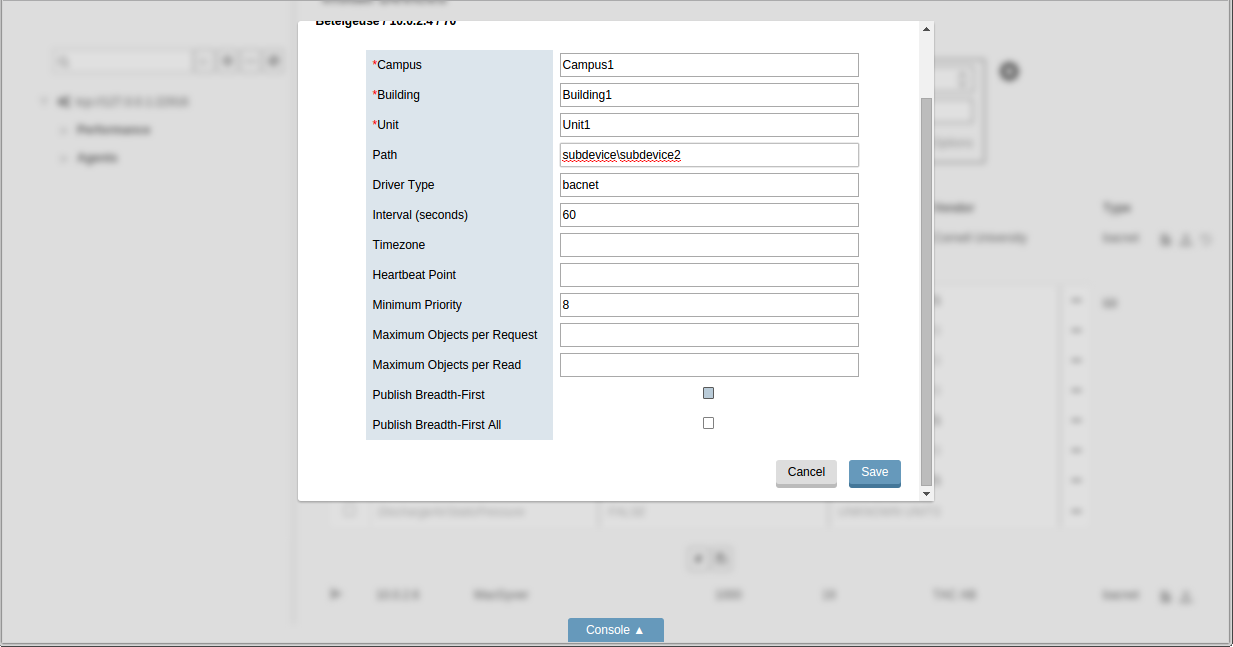
Device Configuration Form
After the registry configuration file has been saved, the device configuration form appears. Creating the device configuration results in the virtual device being installed in the platform and determines the device’s position in the side panel tree. It also contains some settings that determine how data is collected from the device.

After the device configuration settings have been entered, click the Save button to save the configuration and add the device to the platform.

Configuring Sub-devices
After a device has been configured, sub-devices can be configured by pointing to their position in the Path
attribute of the device configuration form. But a sub-device can’t be configured until its parent device has been
configured first.
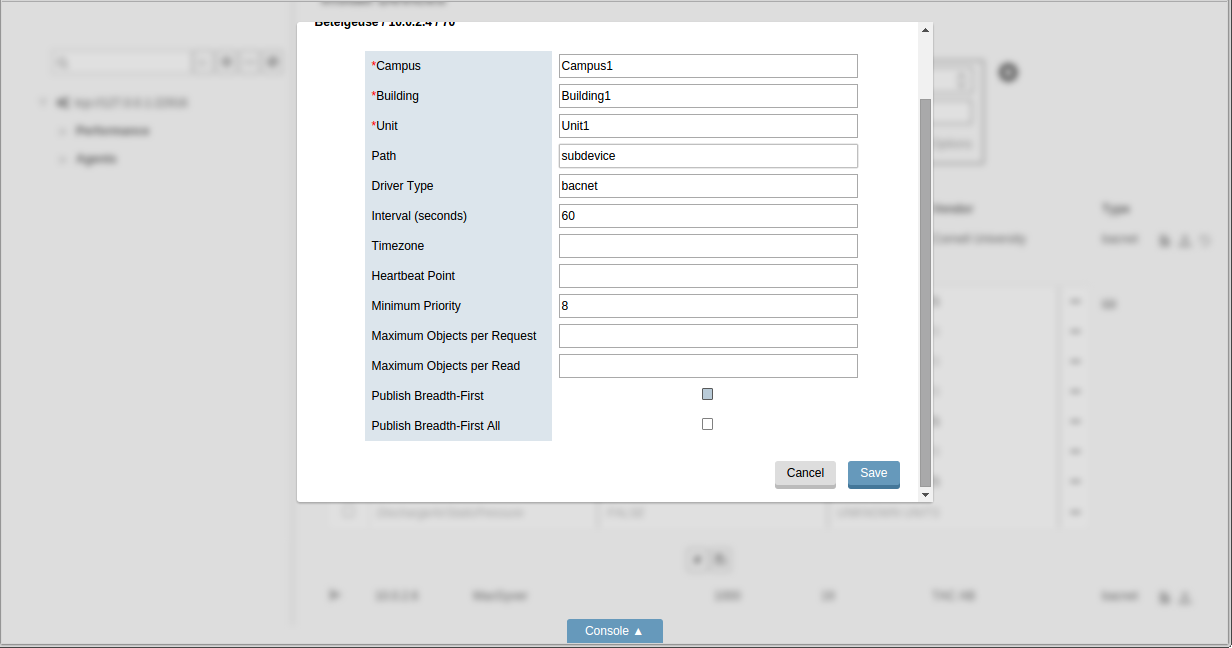
As devices are configured, they’re inserted into position in the side panel tree, along with their configured points.
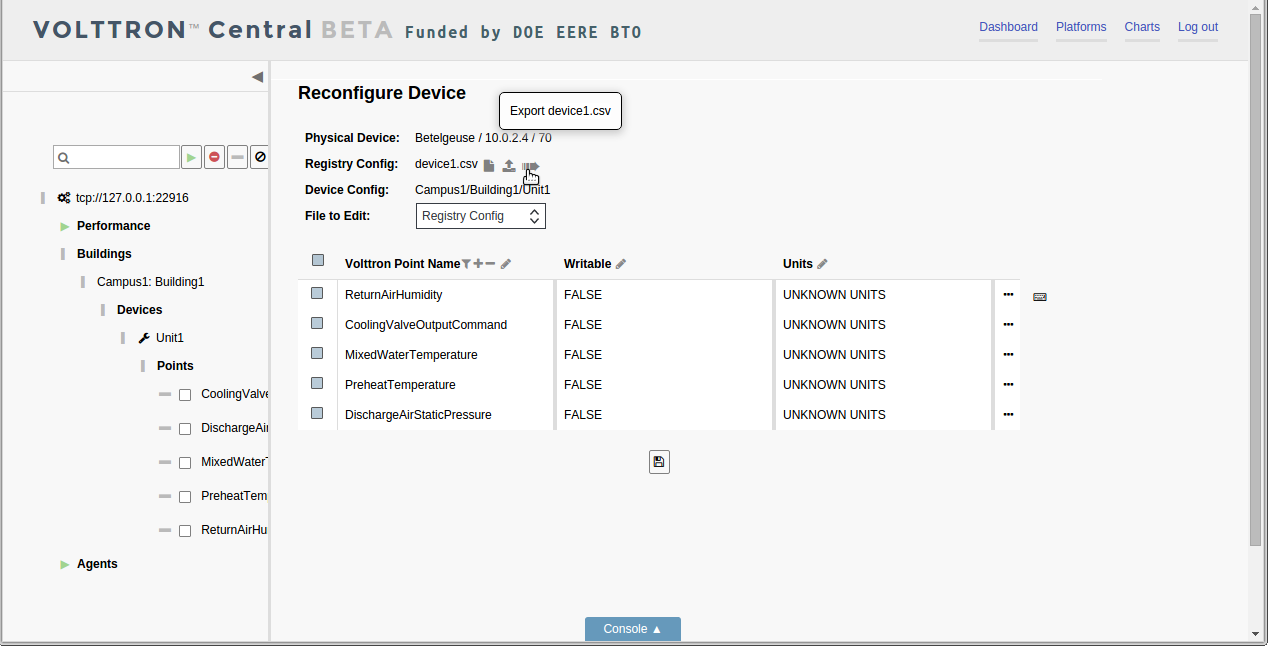
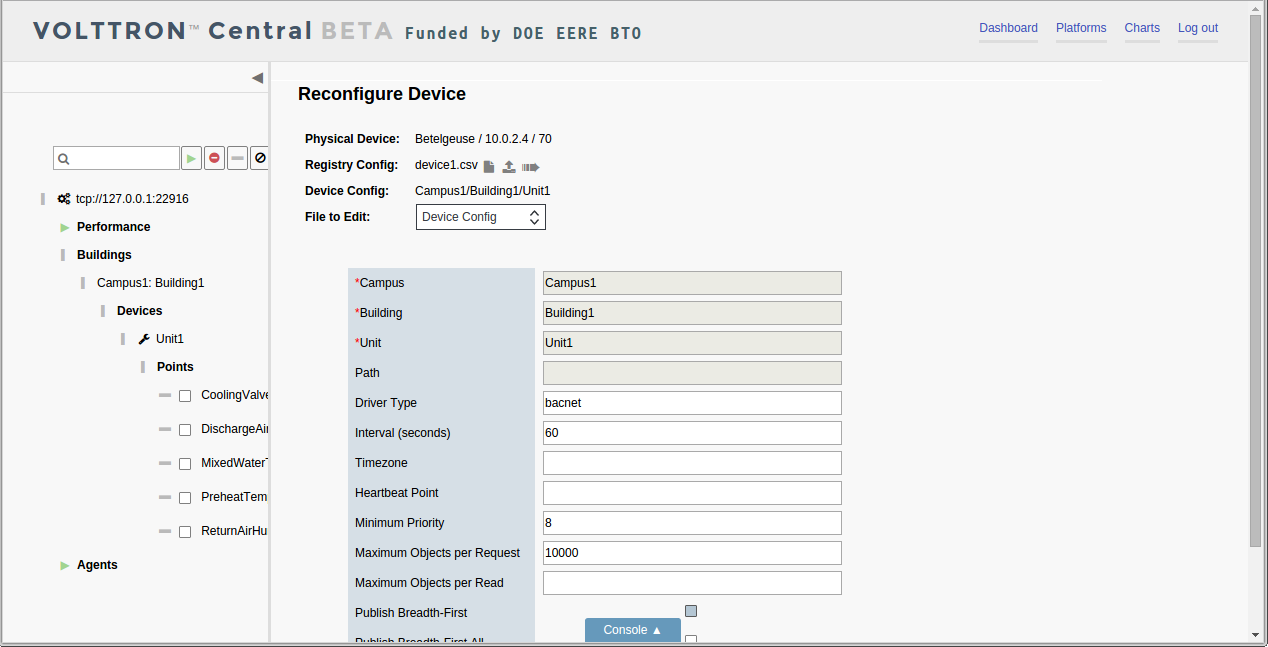
Reconfiguring Devices
A device that’s been added to a VOLTTRON instance can be reconfigured by changing its registry configuration or its device configuration. To launch reconfiguration, click on the wrench button next to the device in the side panel tree.

Reconfiguration reloads the registry configuration editor and the device configuration form for the virtual device. The editor and the form work the same way in reconfiguration as during initial device configuration.
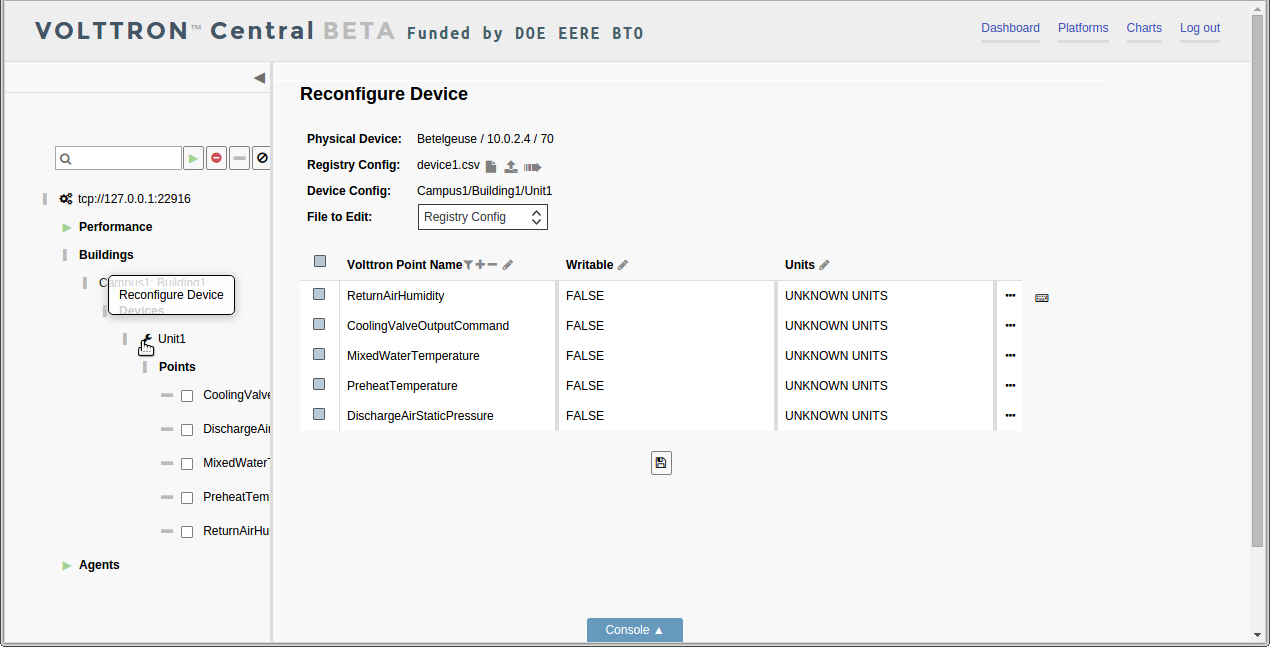
The reconfiguration view shows the name, address, and ID of the physical device that the virtual device was configured from. It also shows the name of the registry configuration file associated with the virtual device as well as its configured path.
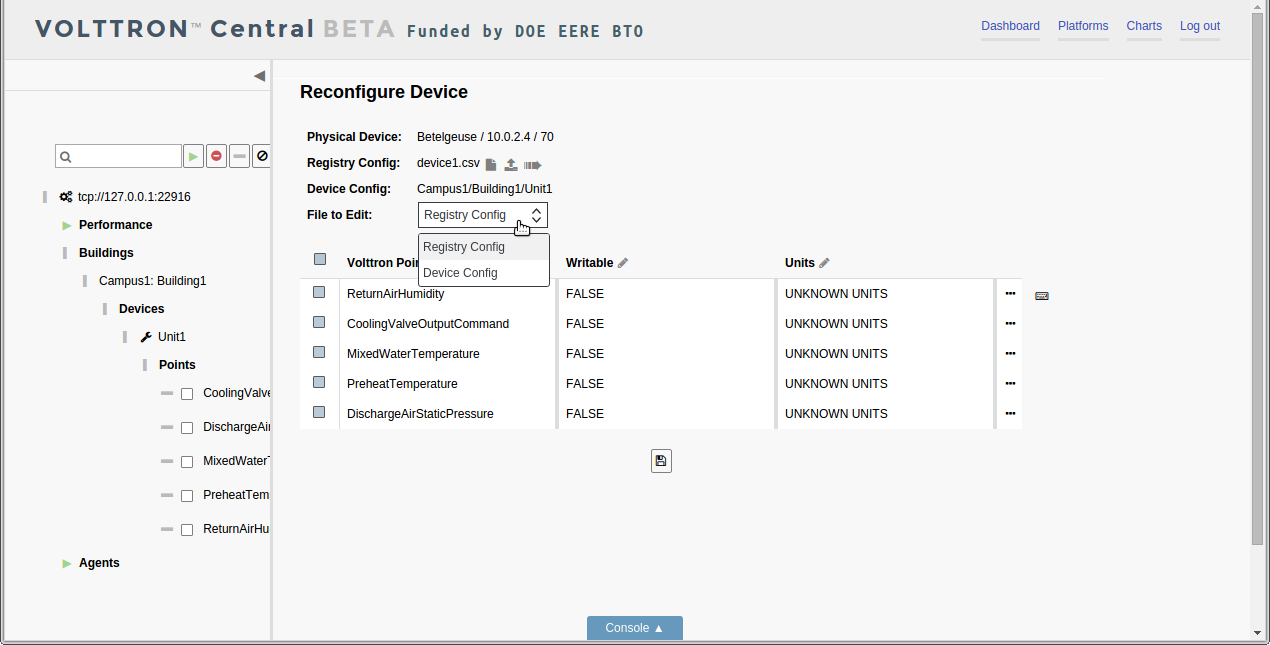
A different registry configuration file can be associated with the device by clicking on the Select Registry File (CSV) button or the Import Registry File (CSV) button.
The registry configuration can be edited by making changes to the configuration in the editor and clicking the Save button.
To make changes to the device configuration form, click on the File to Edit selector and choose Device Config.
Exporting Registry Configuration Files
The registry configuration file associated with a virtual device can be exported from the web browser to the computer’s local storage by clicking on the File Export Button in the device reconfiguration view.